Prerequisites
- Download and install the AWS CLI. This is required for creating and accessing the cluster.
- Download and install kubectl CLI. This is needed for cluster access through the cli.
Cluster Setup and Configuration
Create the Cluster
Navigate to Elastic Kubernetes Service (EKS) and create a new cluster. ForCluster service role, create a new IAM role accepting all the defaults for the user. It’s name can
be something like RECAP-eks-cluster-role.
Make sure to click the refresh button if you don’t see it as an option!
For the Kubernetes version, select a version with standard support still offered and under Upgrade policy, select Standard. In the add-ons section, make sure to add the Amazon EBS CSI Driver add-on, as this is needed for the Persistent Volume Claims (PVCs) to be fulfilled. Also make sure to keep the other default add-ons!
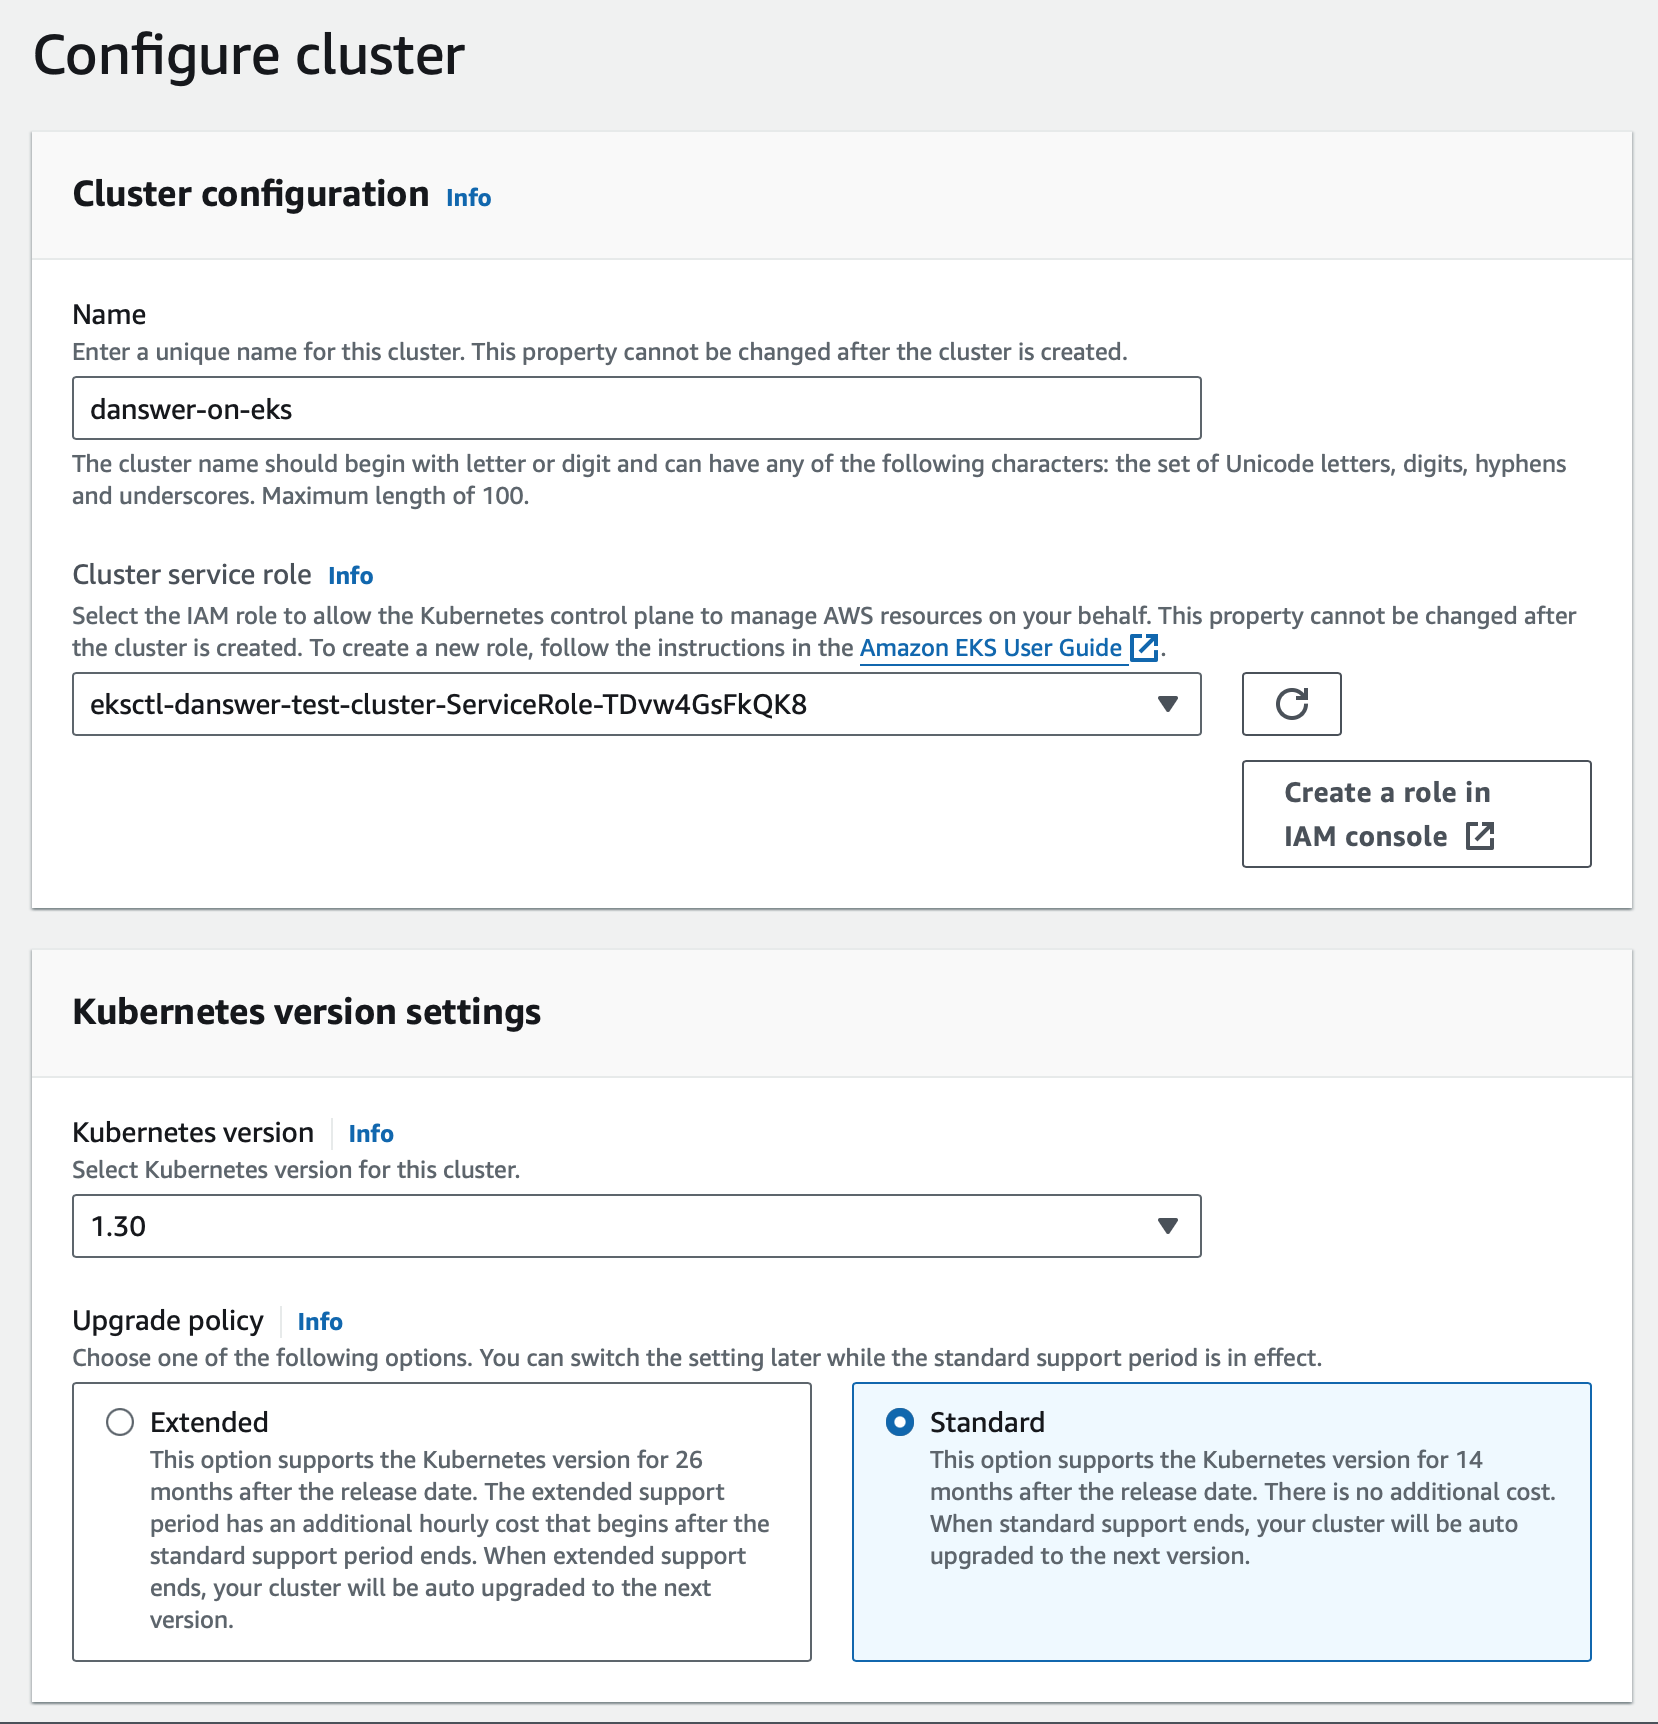 Select defaults for the rest of the forms. Finally, review the complete cluster setup and click
 Create when satisfied. The cluster may take several minutes to become ready.
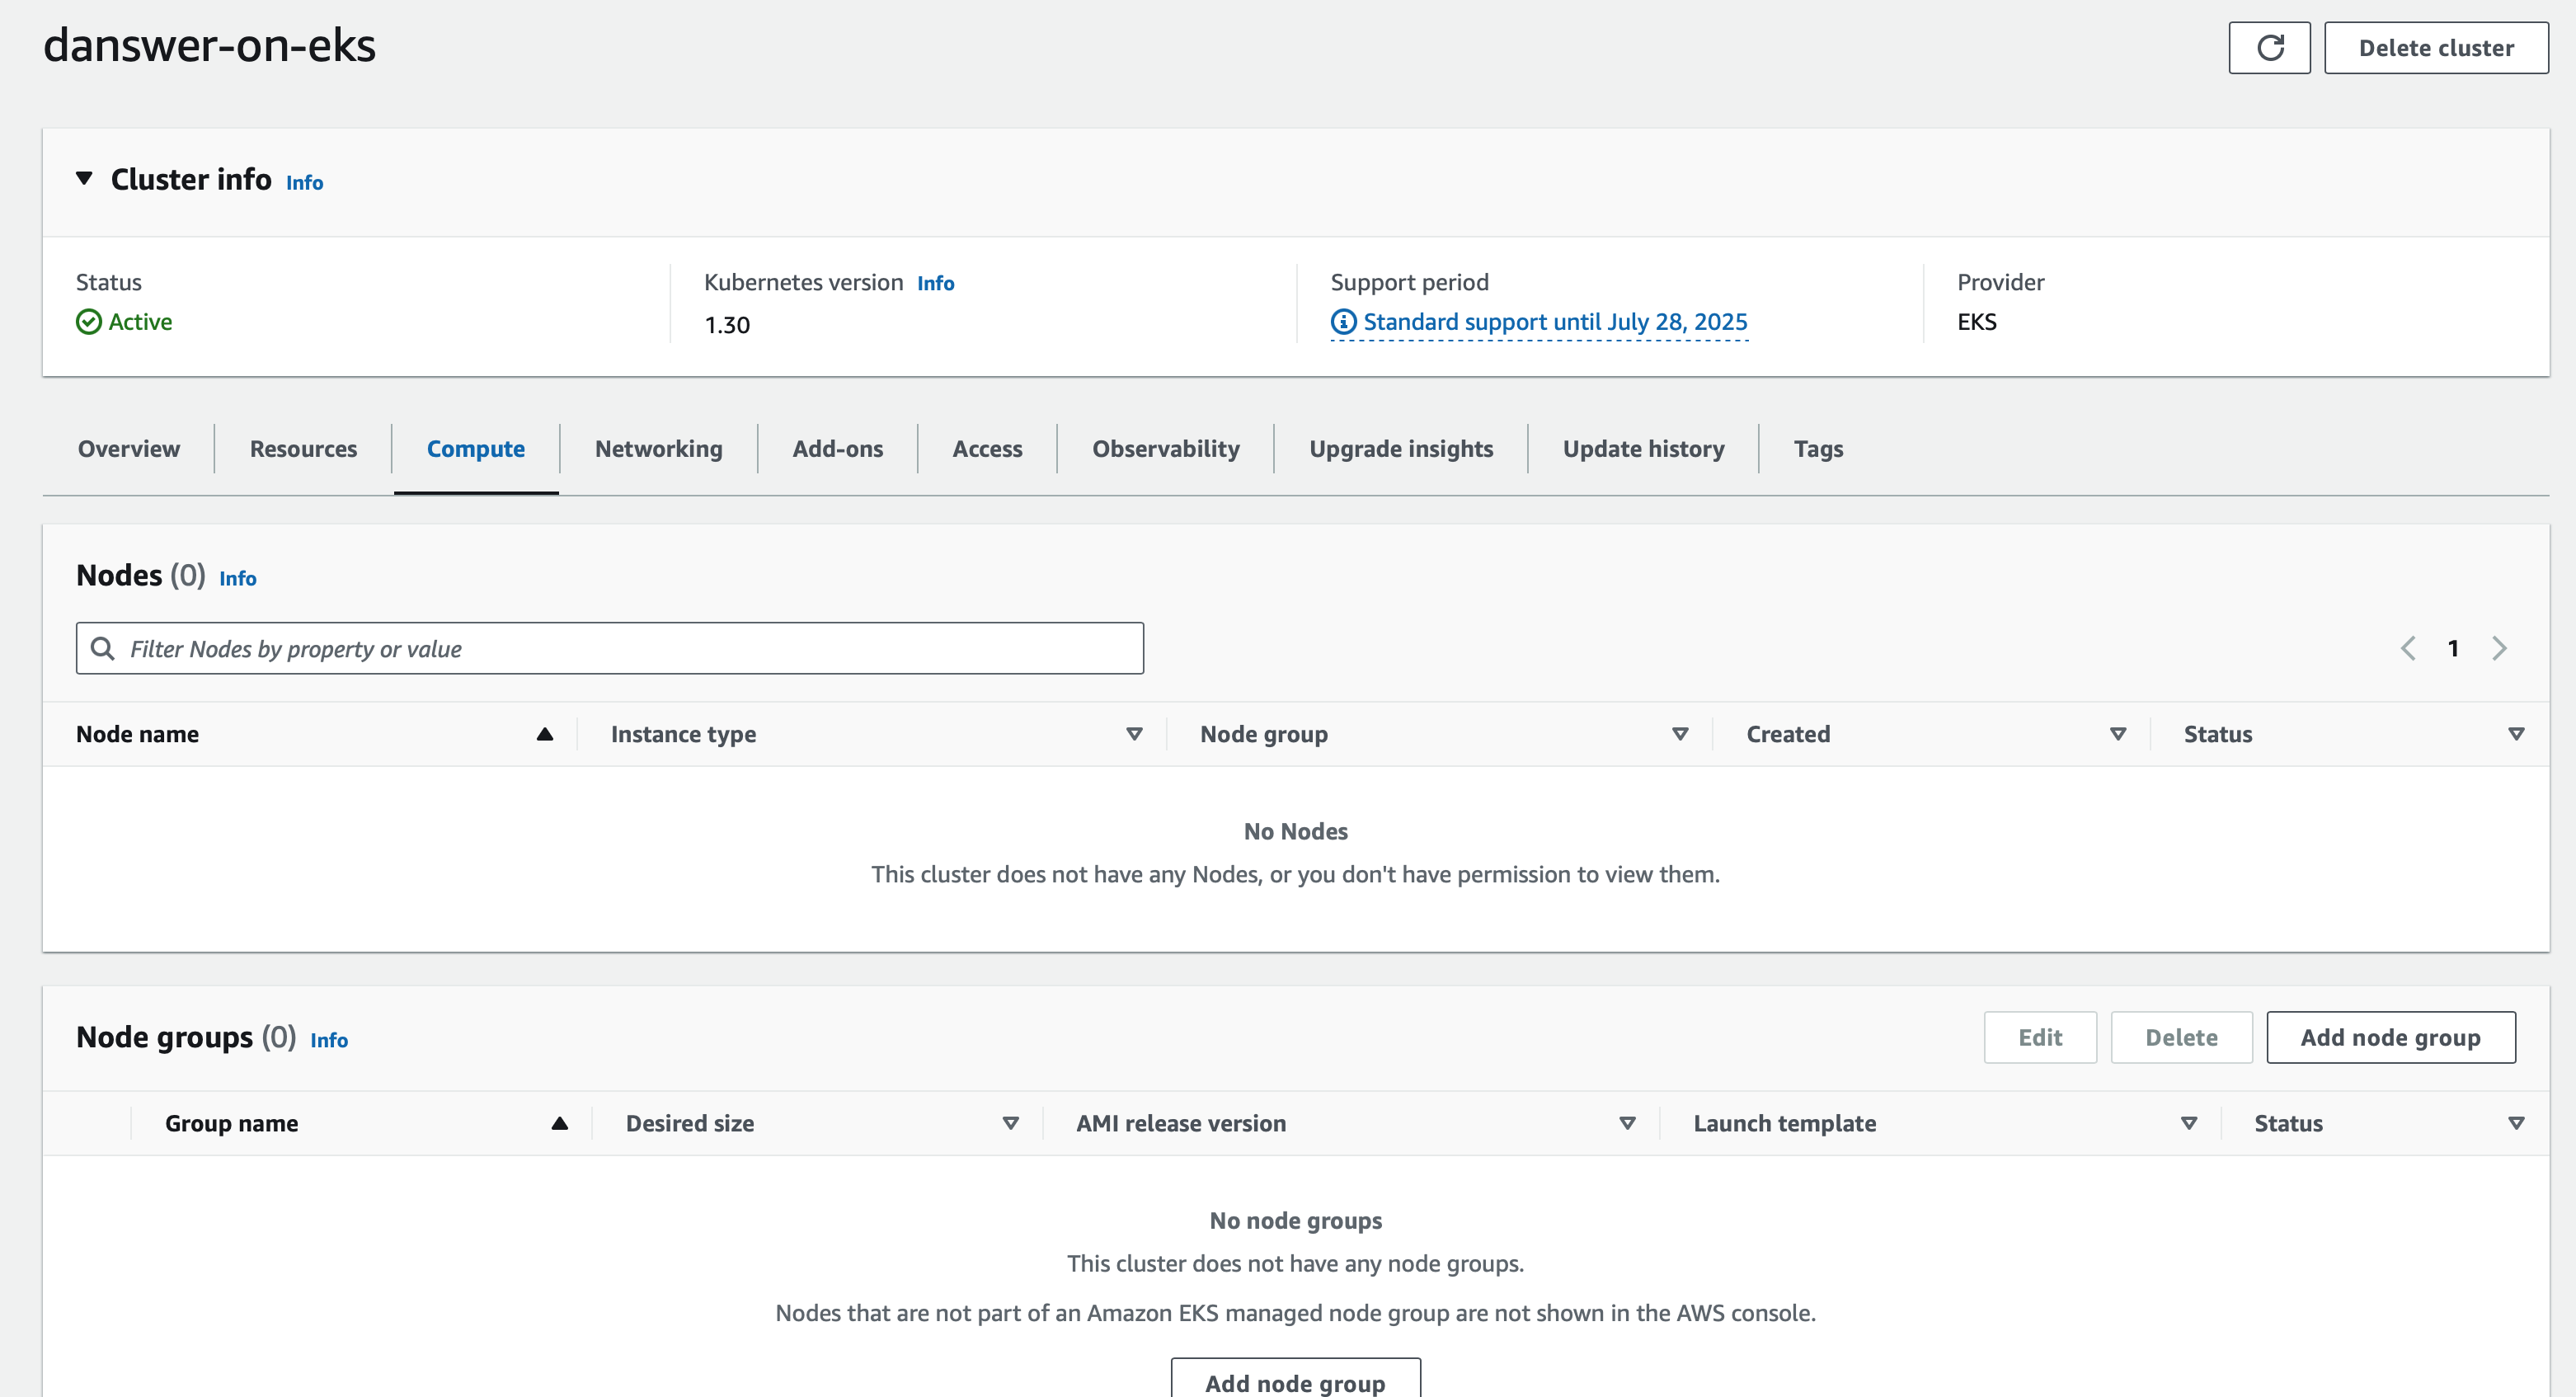
Adding Nodes
Next we need to add worker nodes to the cluster. This is where the RECAP services will reside. When the cluster is Active and while viewing the cluster, select theCompute tab and then Add node group.
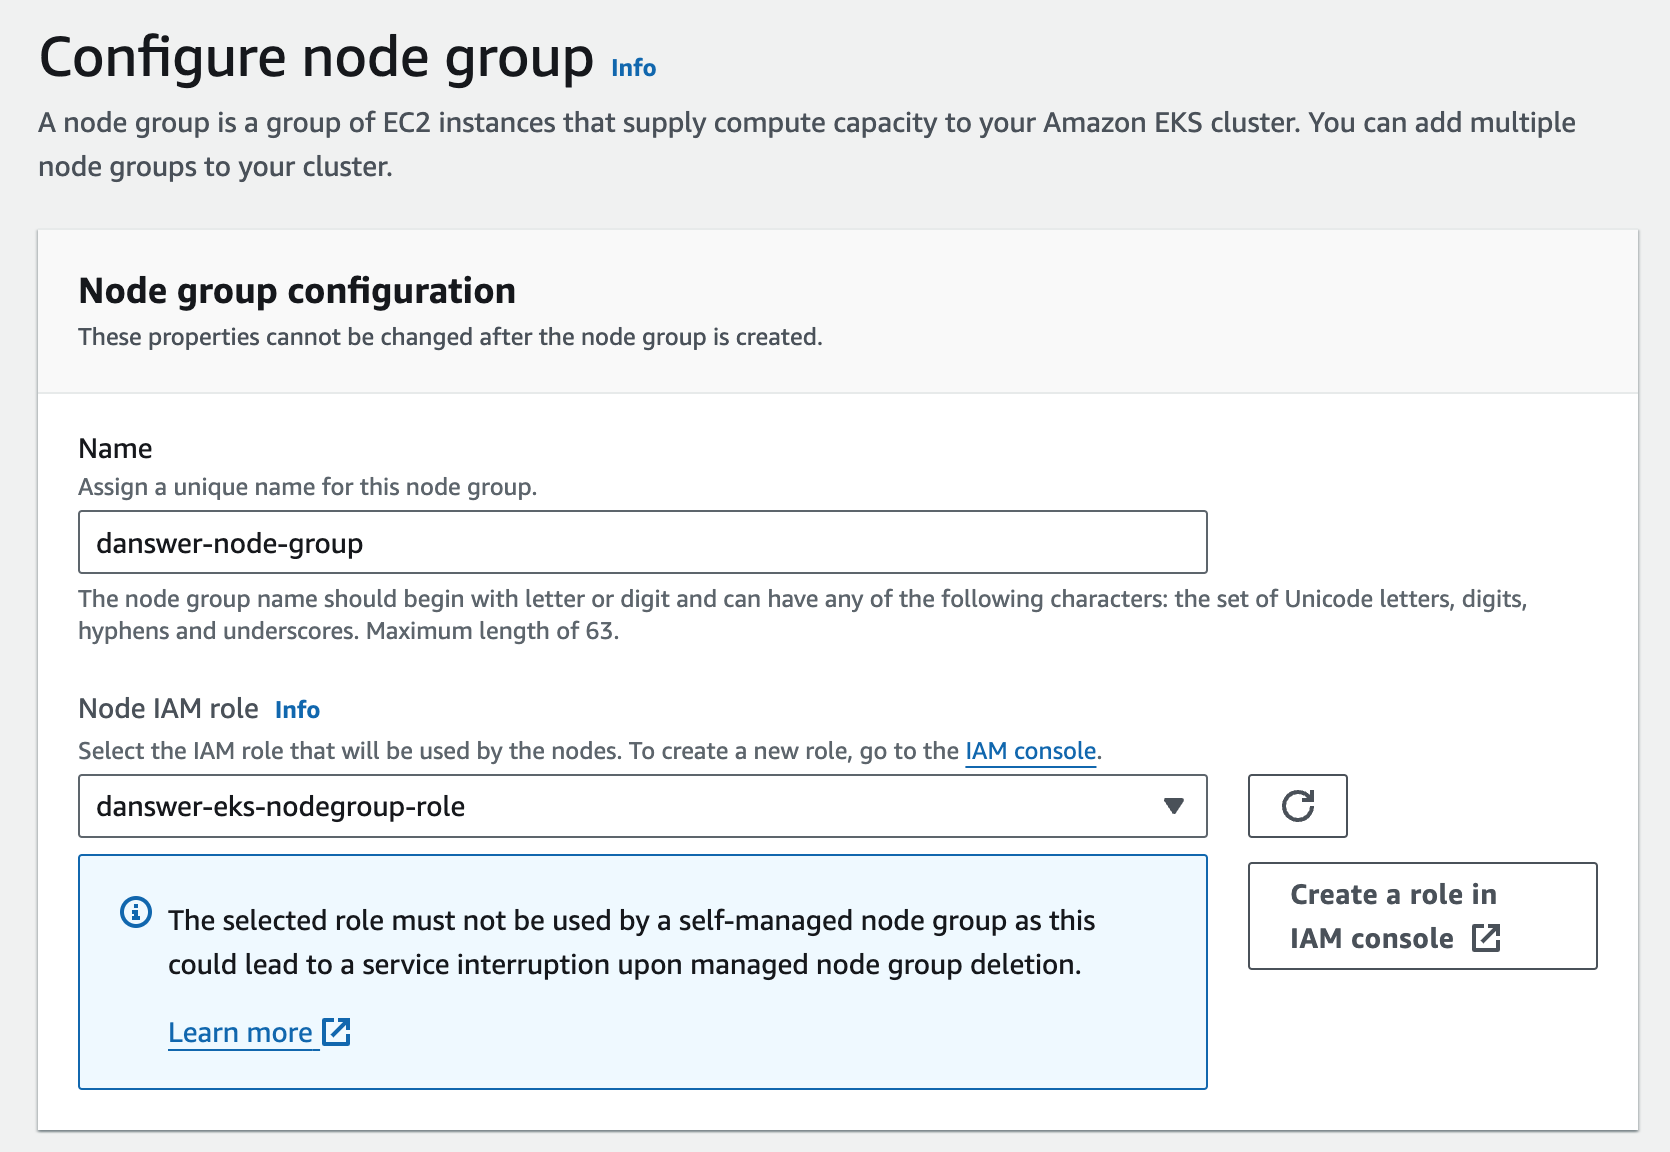
 First, provide a
 Name for the group (something like RECAP-node-group). For Node IAM role, either select
an existing role that your organization has setup or create a new role. Whichever route we choose, we have to make sure
that the AmazonEBSCSIDriverPolicy is attached to the role, as this will be needed for our Persistent Volume Claims (PVCs)
to be fulfilled. If creating a role, all the other defaults provided by AWS should work (with the addition of the AmazonEBSCSIDriverPolicy). Give the role a name like RECAP-eks-nodegroup-role.
 Replace the
 Instance Types with c5.2xlarge machines (or c5.4xlarge if you are planning on scaling up beyond 100k documents). For disk, we recommend setting Volume size somewhere in the 200GB - 800GB range depending on how many documents you plan on indexing (storage is cheap). For most setups, we recommend setting the Desired size and Minimum size to 1, although you can increase this if needed to scale the cluster up once traffic picks up. Maximum unavailable can generally be left as default.
After reviewing, keep the default for the Networking section, and then proceed through to Create!
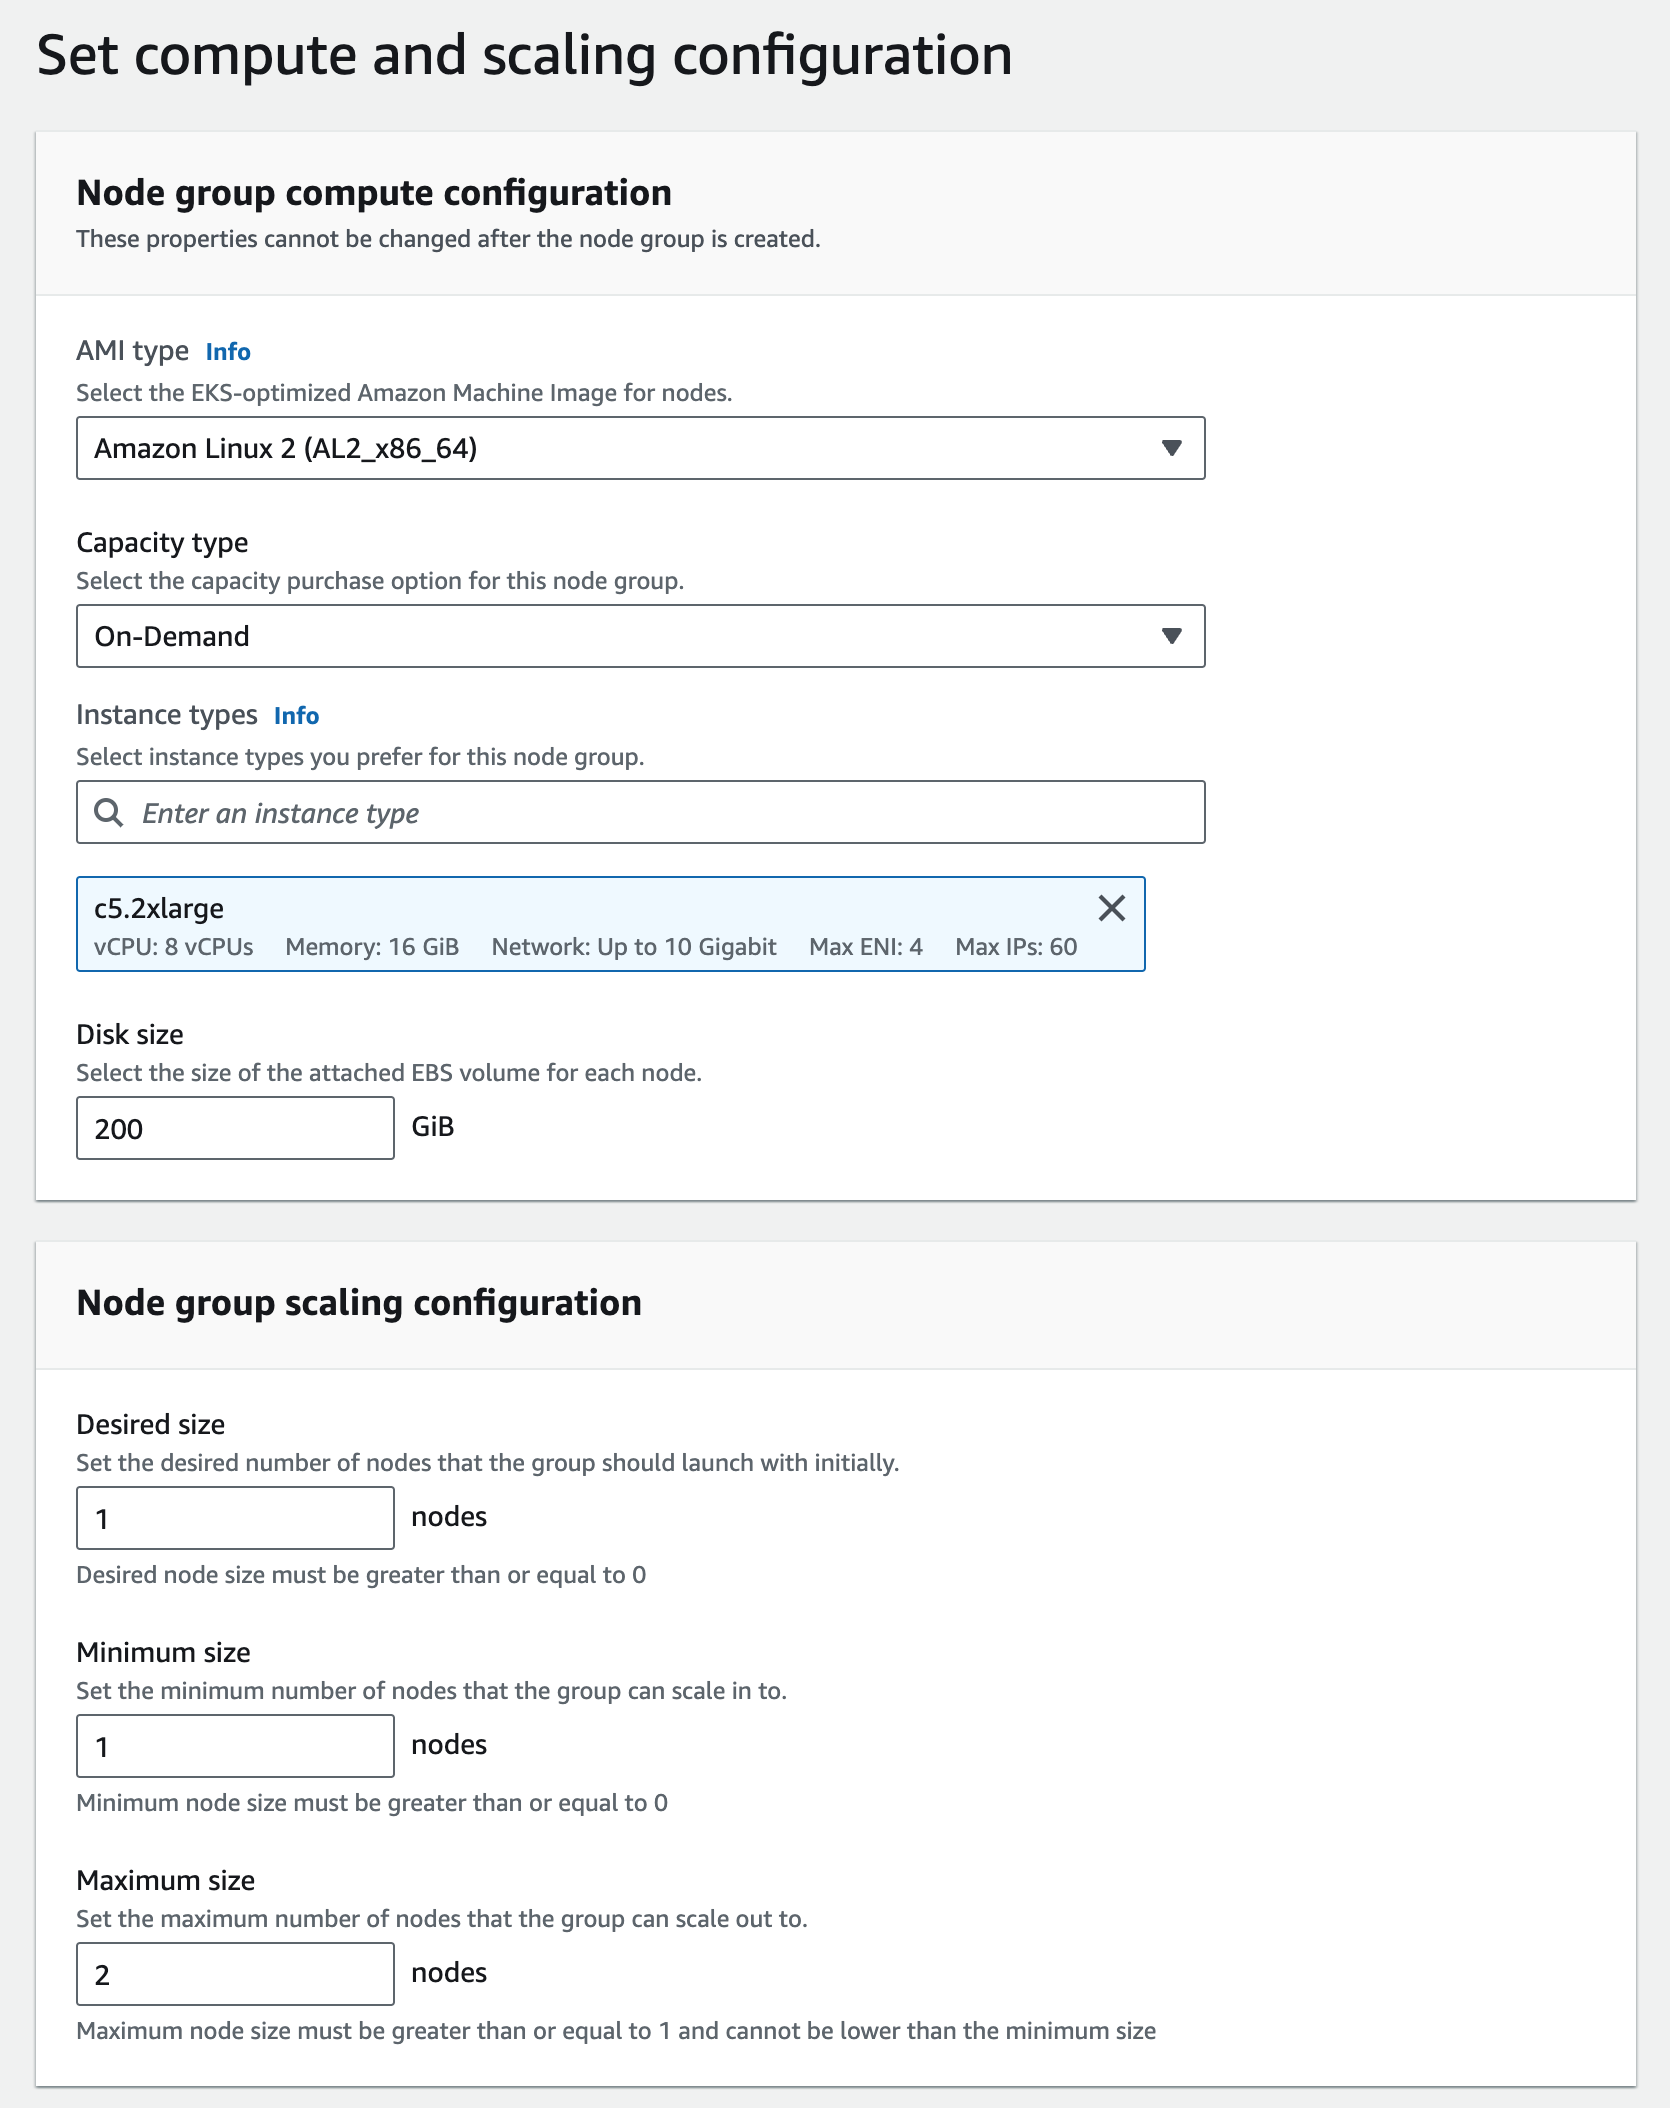 This may take up to 15 minutes for the compute nodes to come online.
Create and Connect a User
You will need to create an IAM user that will have access AWS and the cluster from the command line. Navigate to theIAM Dashboard found here. Select Users on the left sidebar and then Create user.
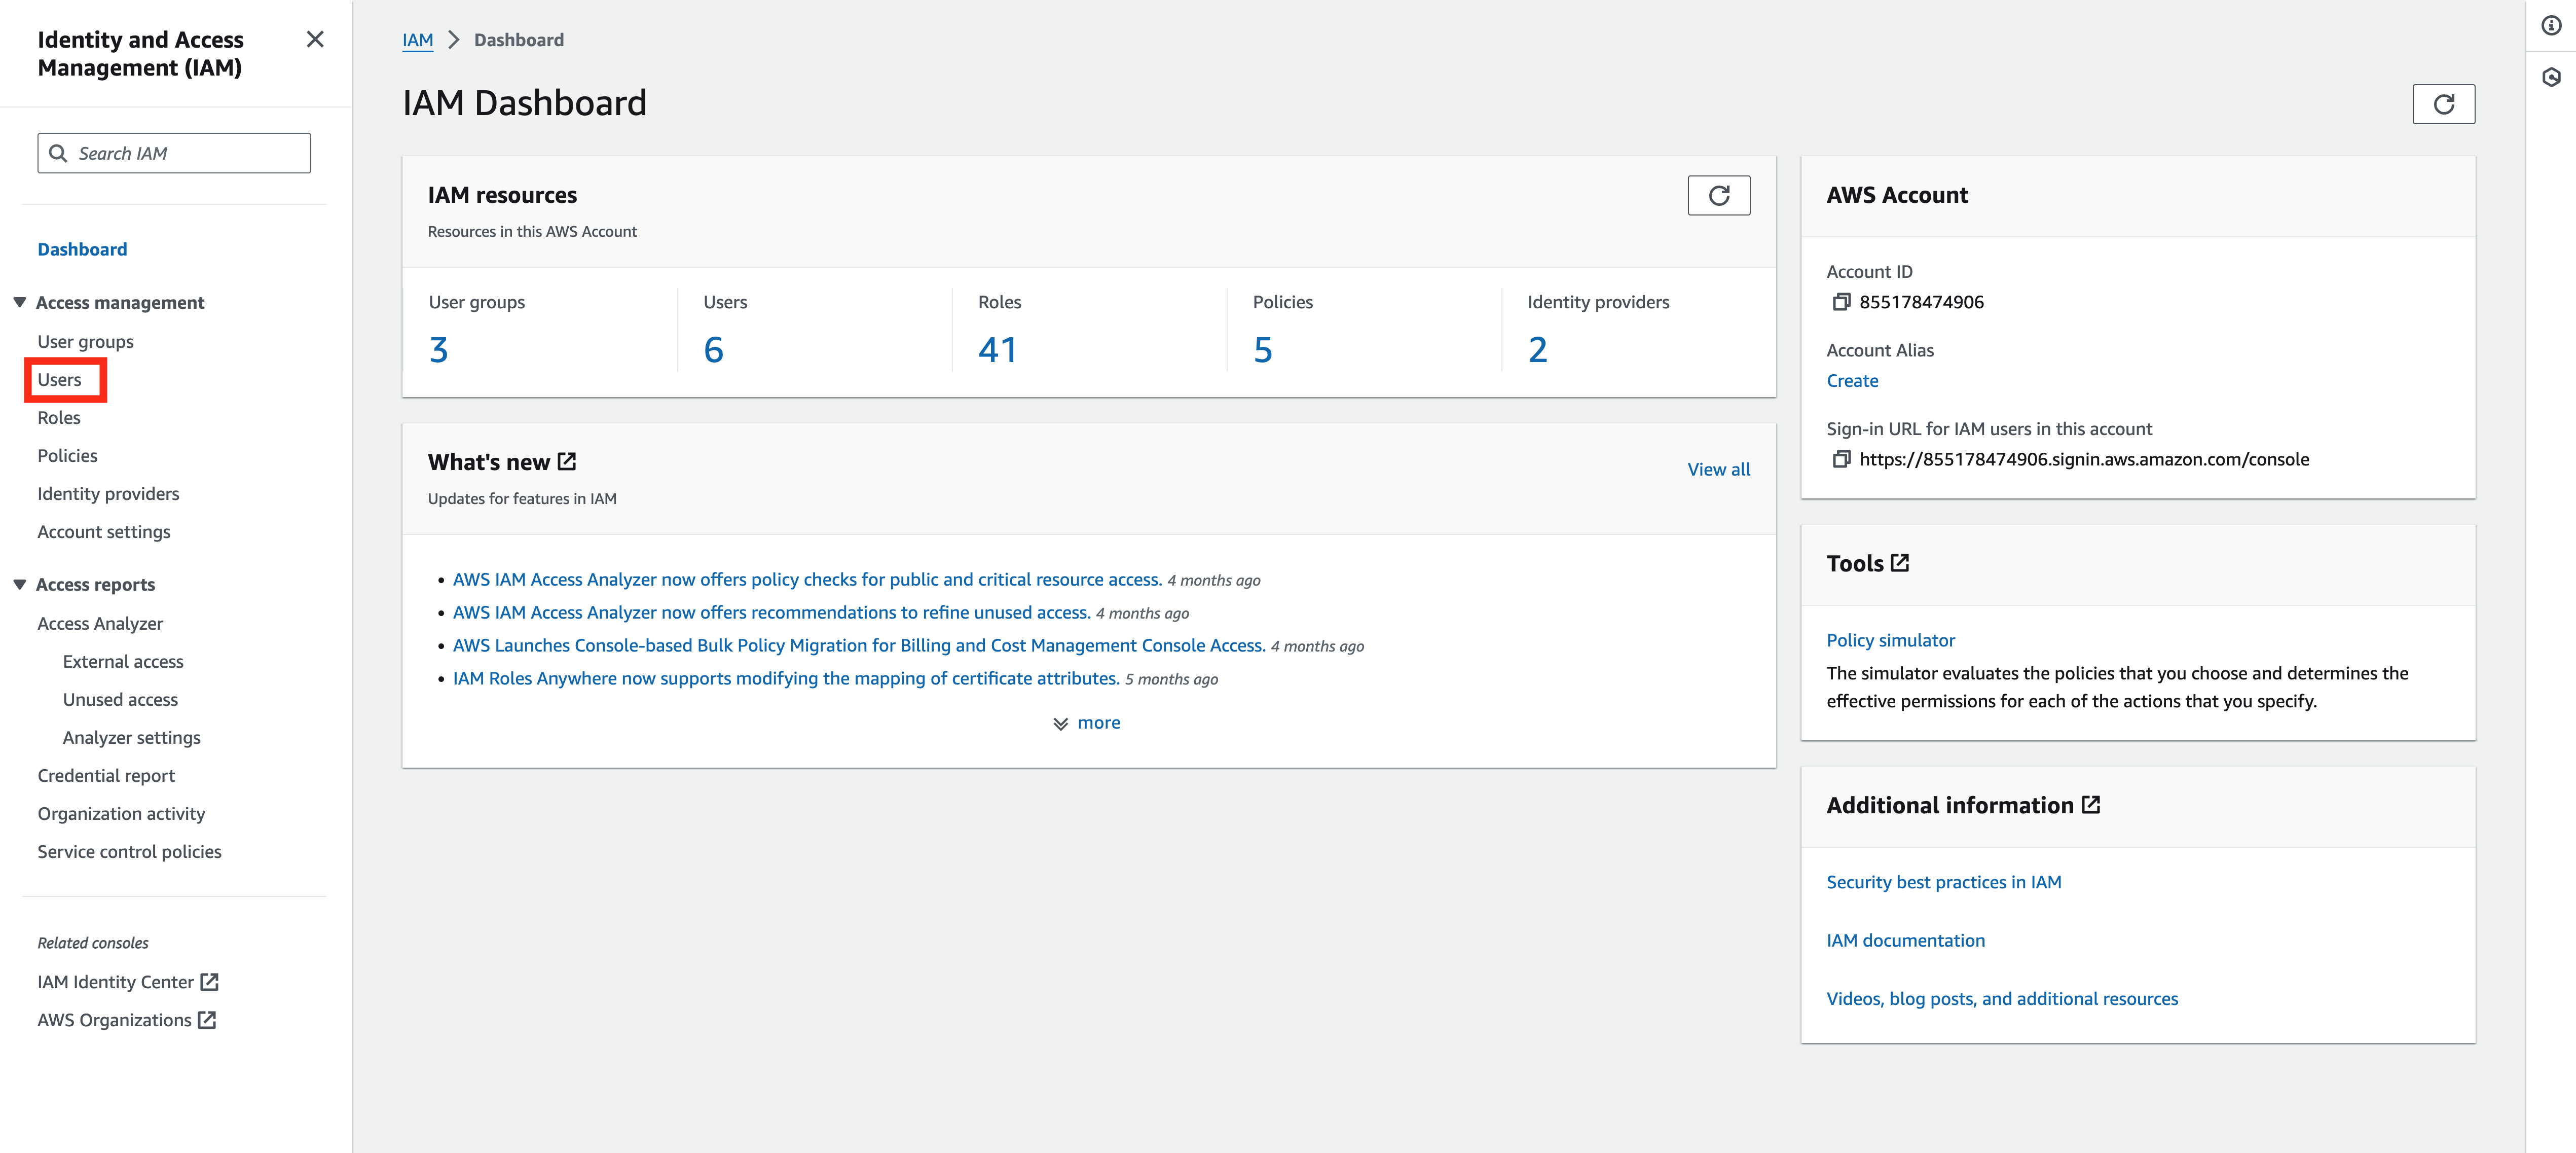 Give the user a name like
 RECAP-eks-user. For the user permissions, click Attach policies directly and provide the following permissions:
AmazonEKSClusterPolicyAmazonEKSServicePolicy
Create access key.
 Follow the process for creating the access key and secret. Select the
 Command Line Interferace (CLI) option during creation. Be sure to save the Access key and Secret access key for later.
Navigate back to the EKS cluster and select Access and then Create access entry.
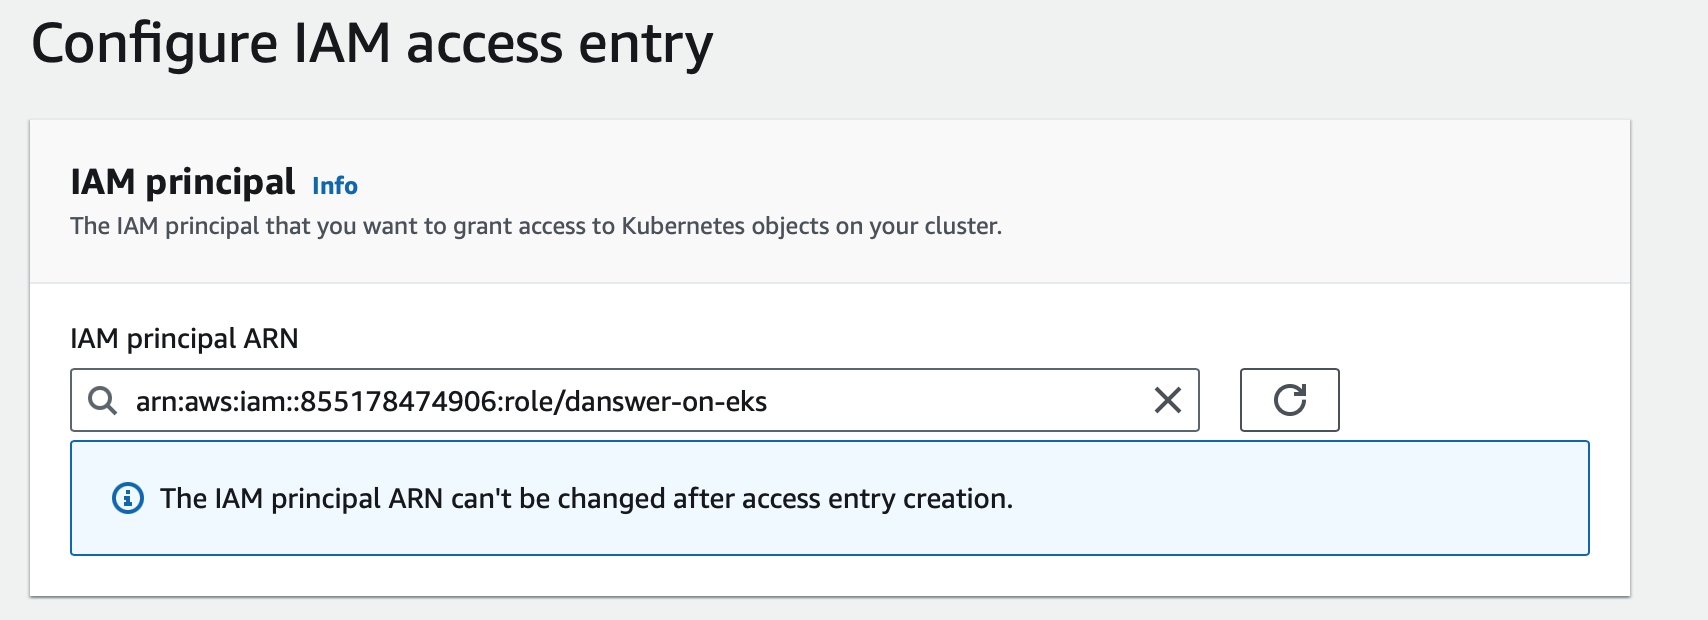
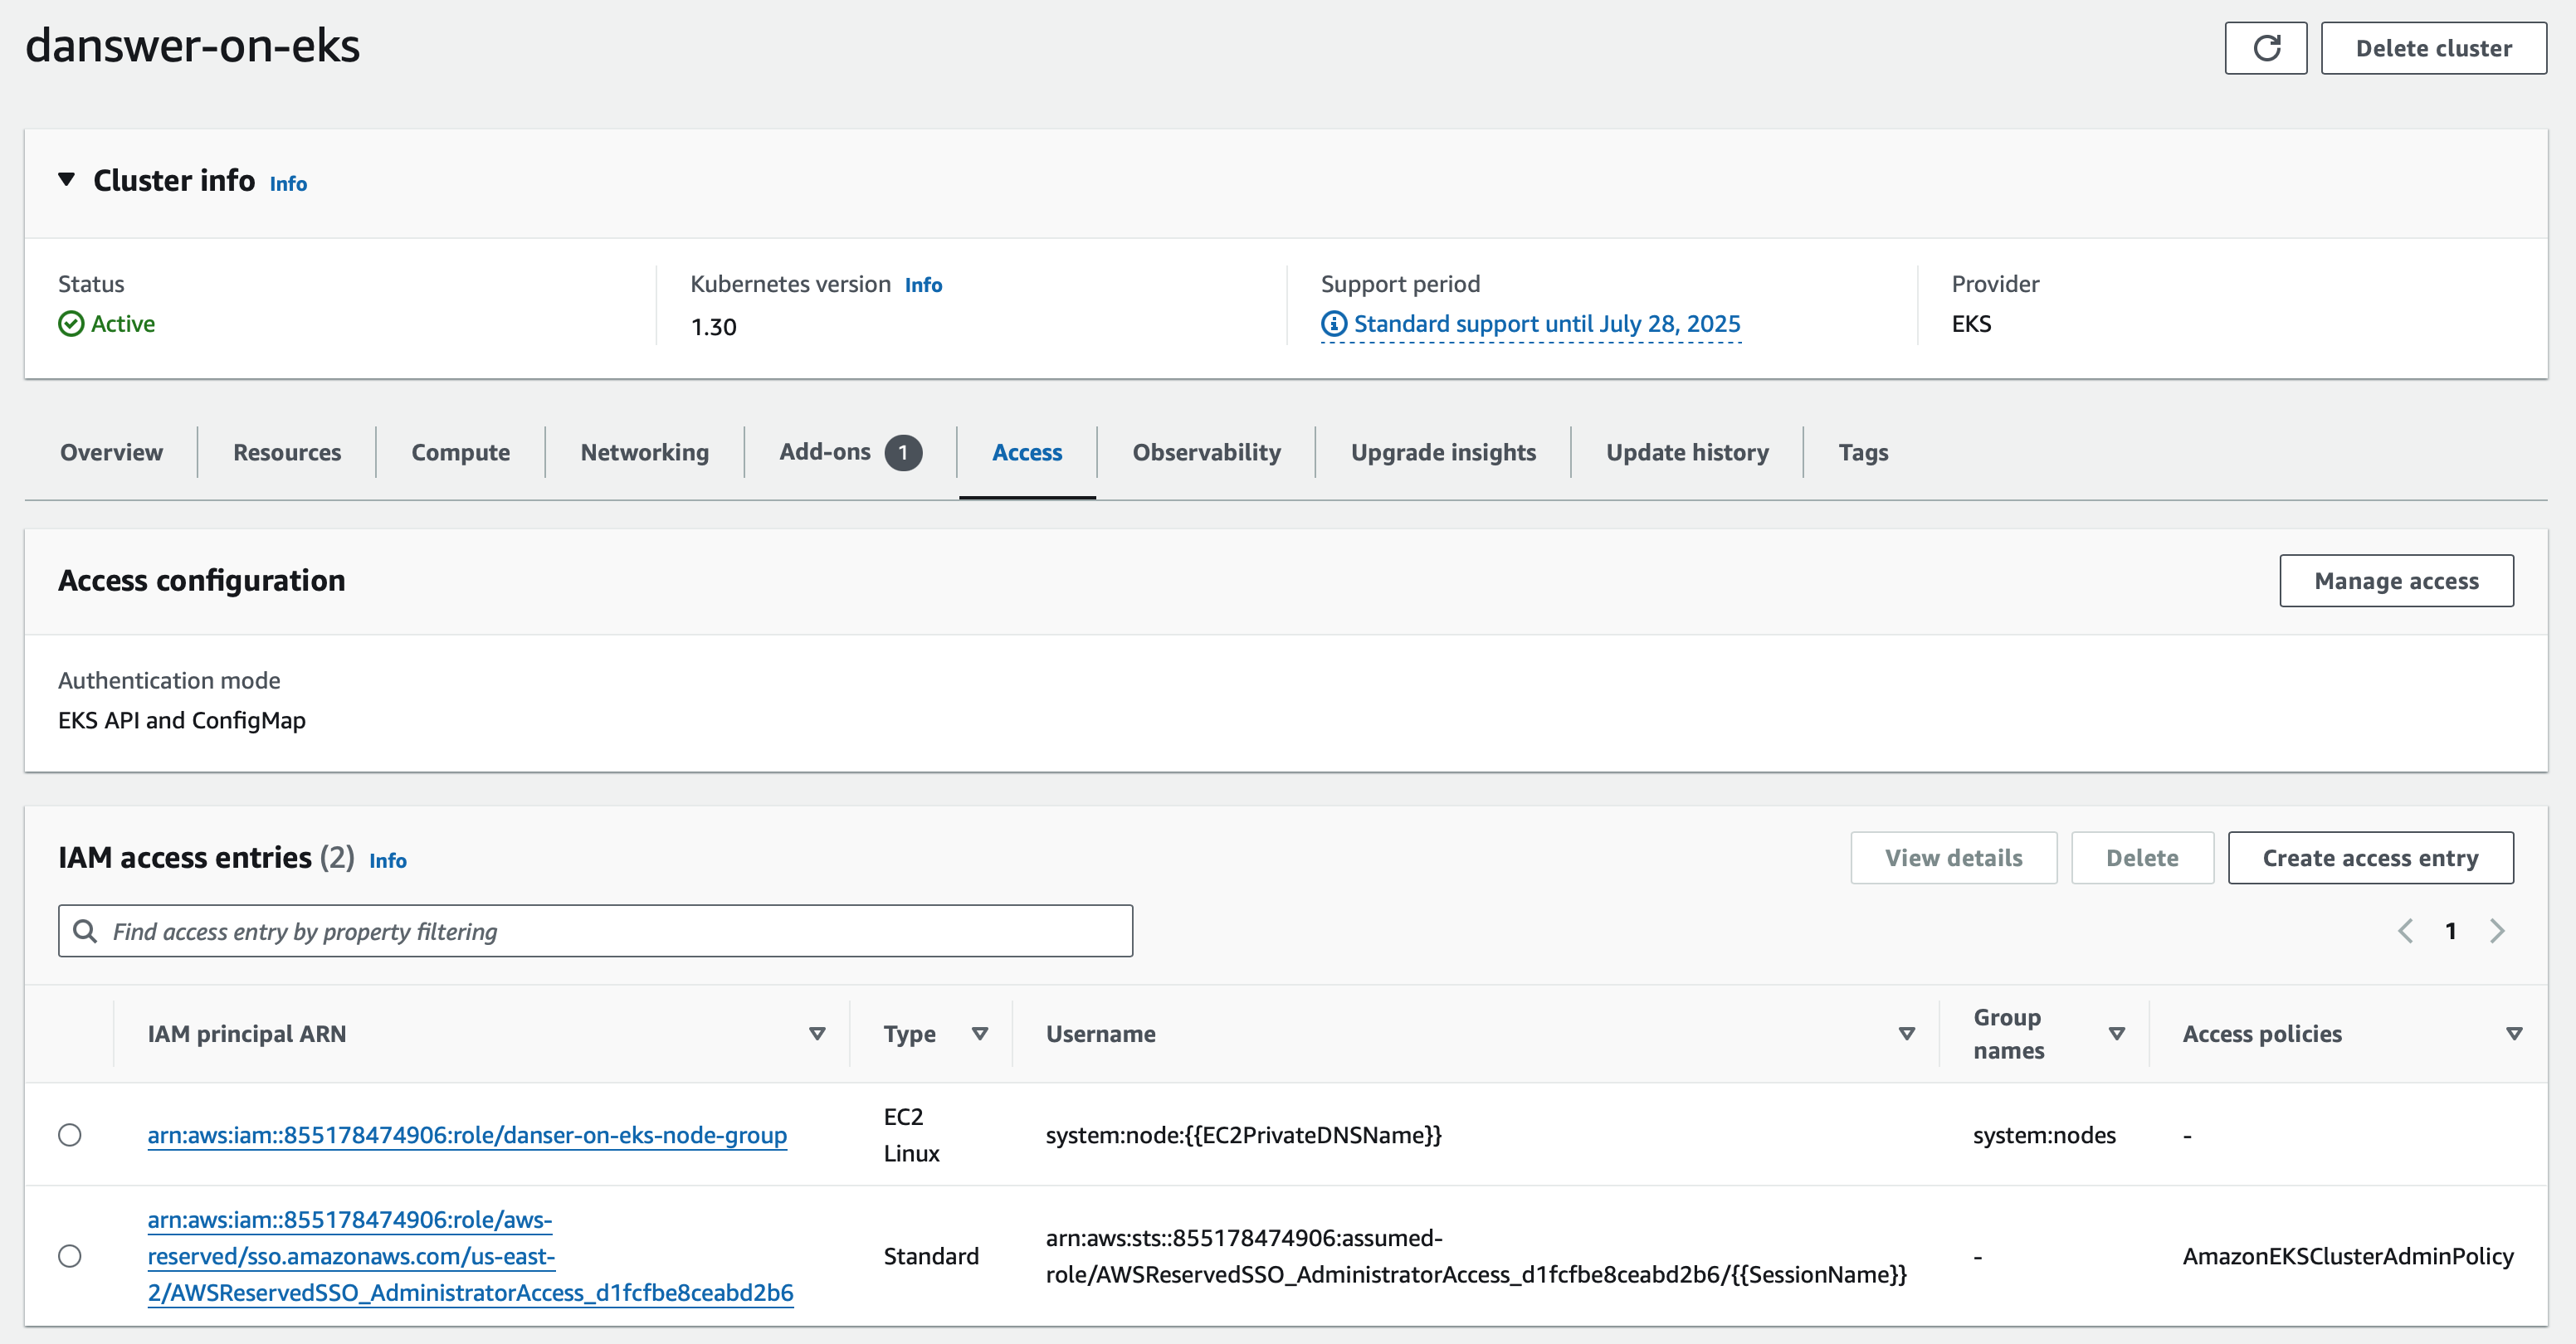 In the
 IAM principal select the IAM ARN that you just created. Then click next.
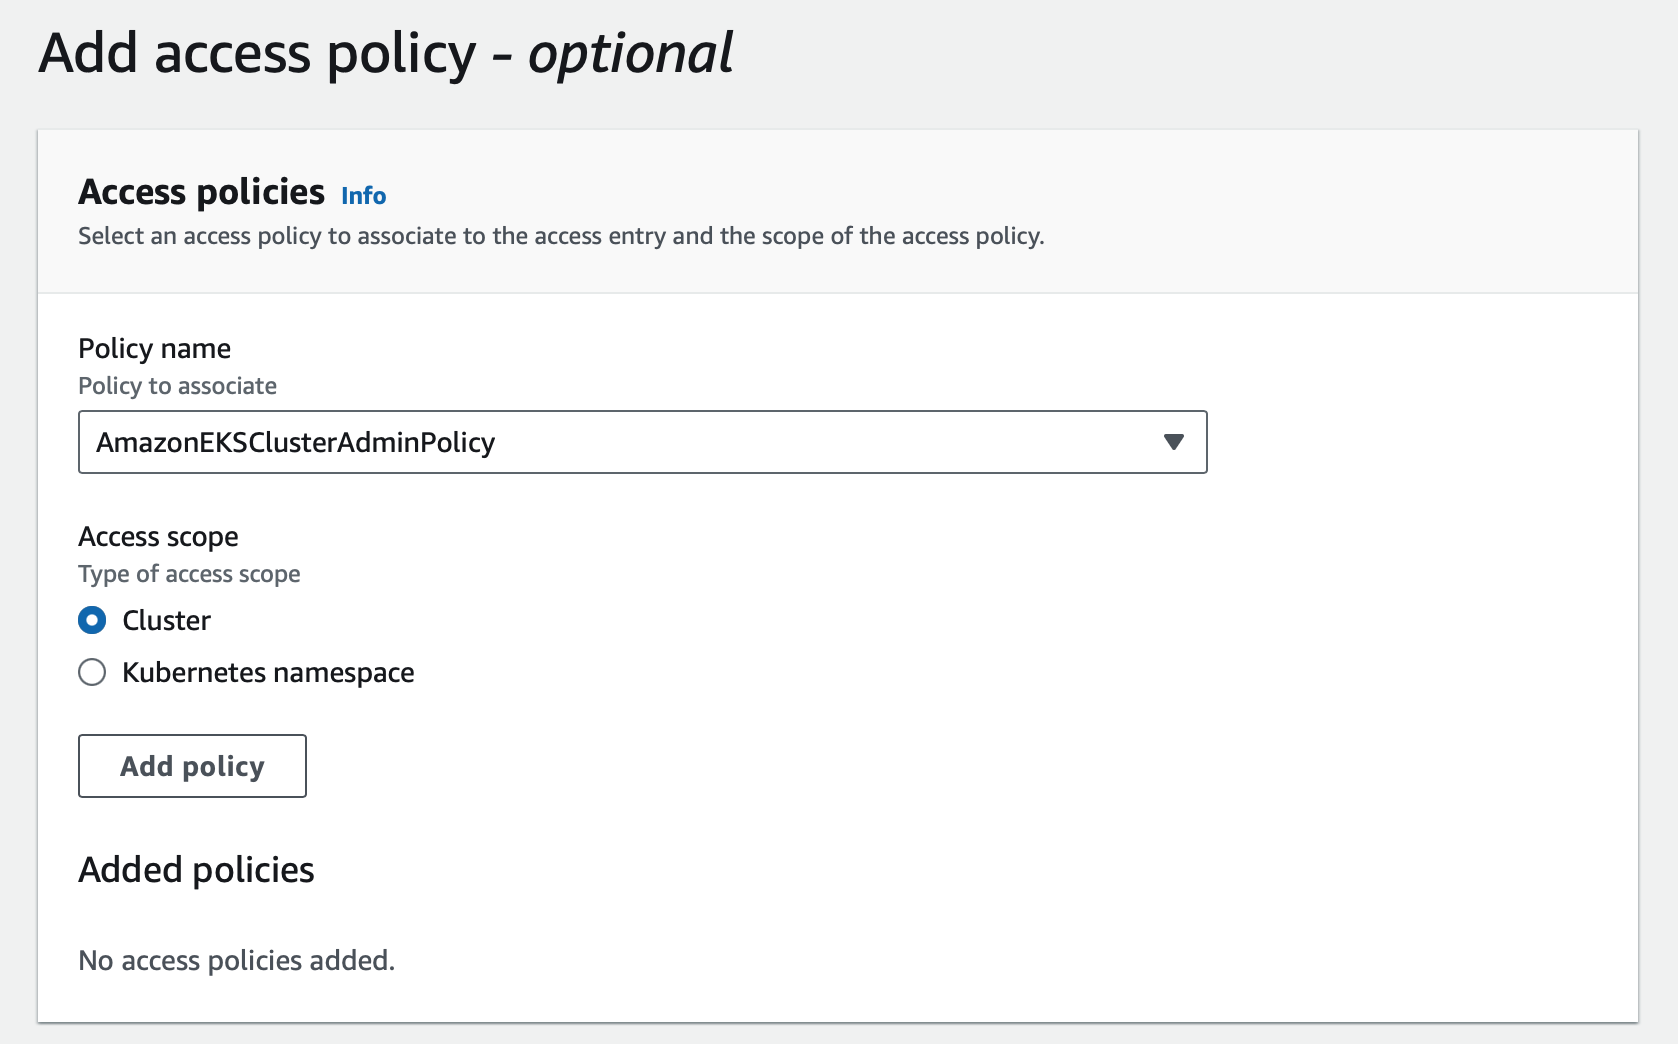
 For the Access policies, ensure that the
 Policy name is set to AmazonEKSClusterAdminPolicy and then click next. Review and then create the Access Policy.
Fetching the kubeconfig file
Log into the AWS CLI withaws configure and provide the access key and secret key from the IAM you created.
Then configure aws to connect with the cluster filling in the region-code and cluster-name in the following command
Installing the Services
You will want to create a namespace for this to install. Namespaces are logical separations of grouped services for resource and permission managament.RECAP/deployment/kubernetes directory in the repository that you have cloned down
Afterwards, you can run the installation of the yaml files