Getting an Instance
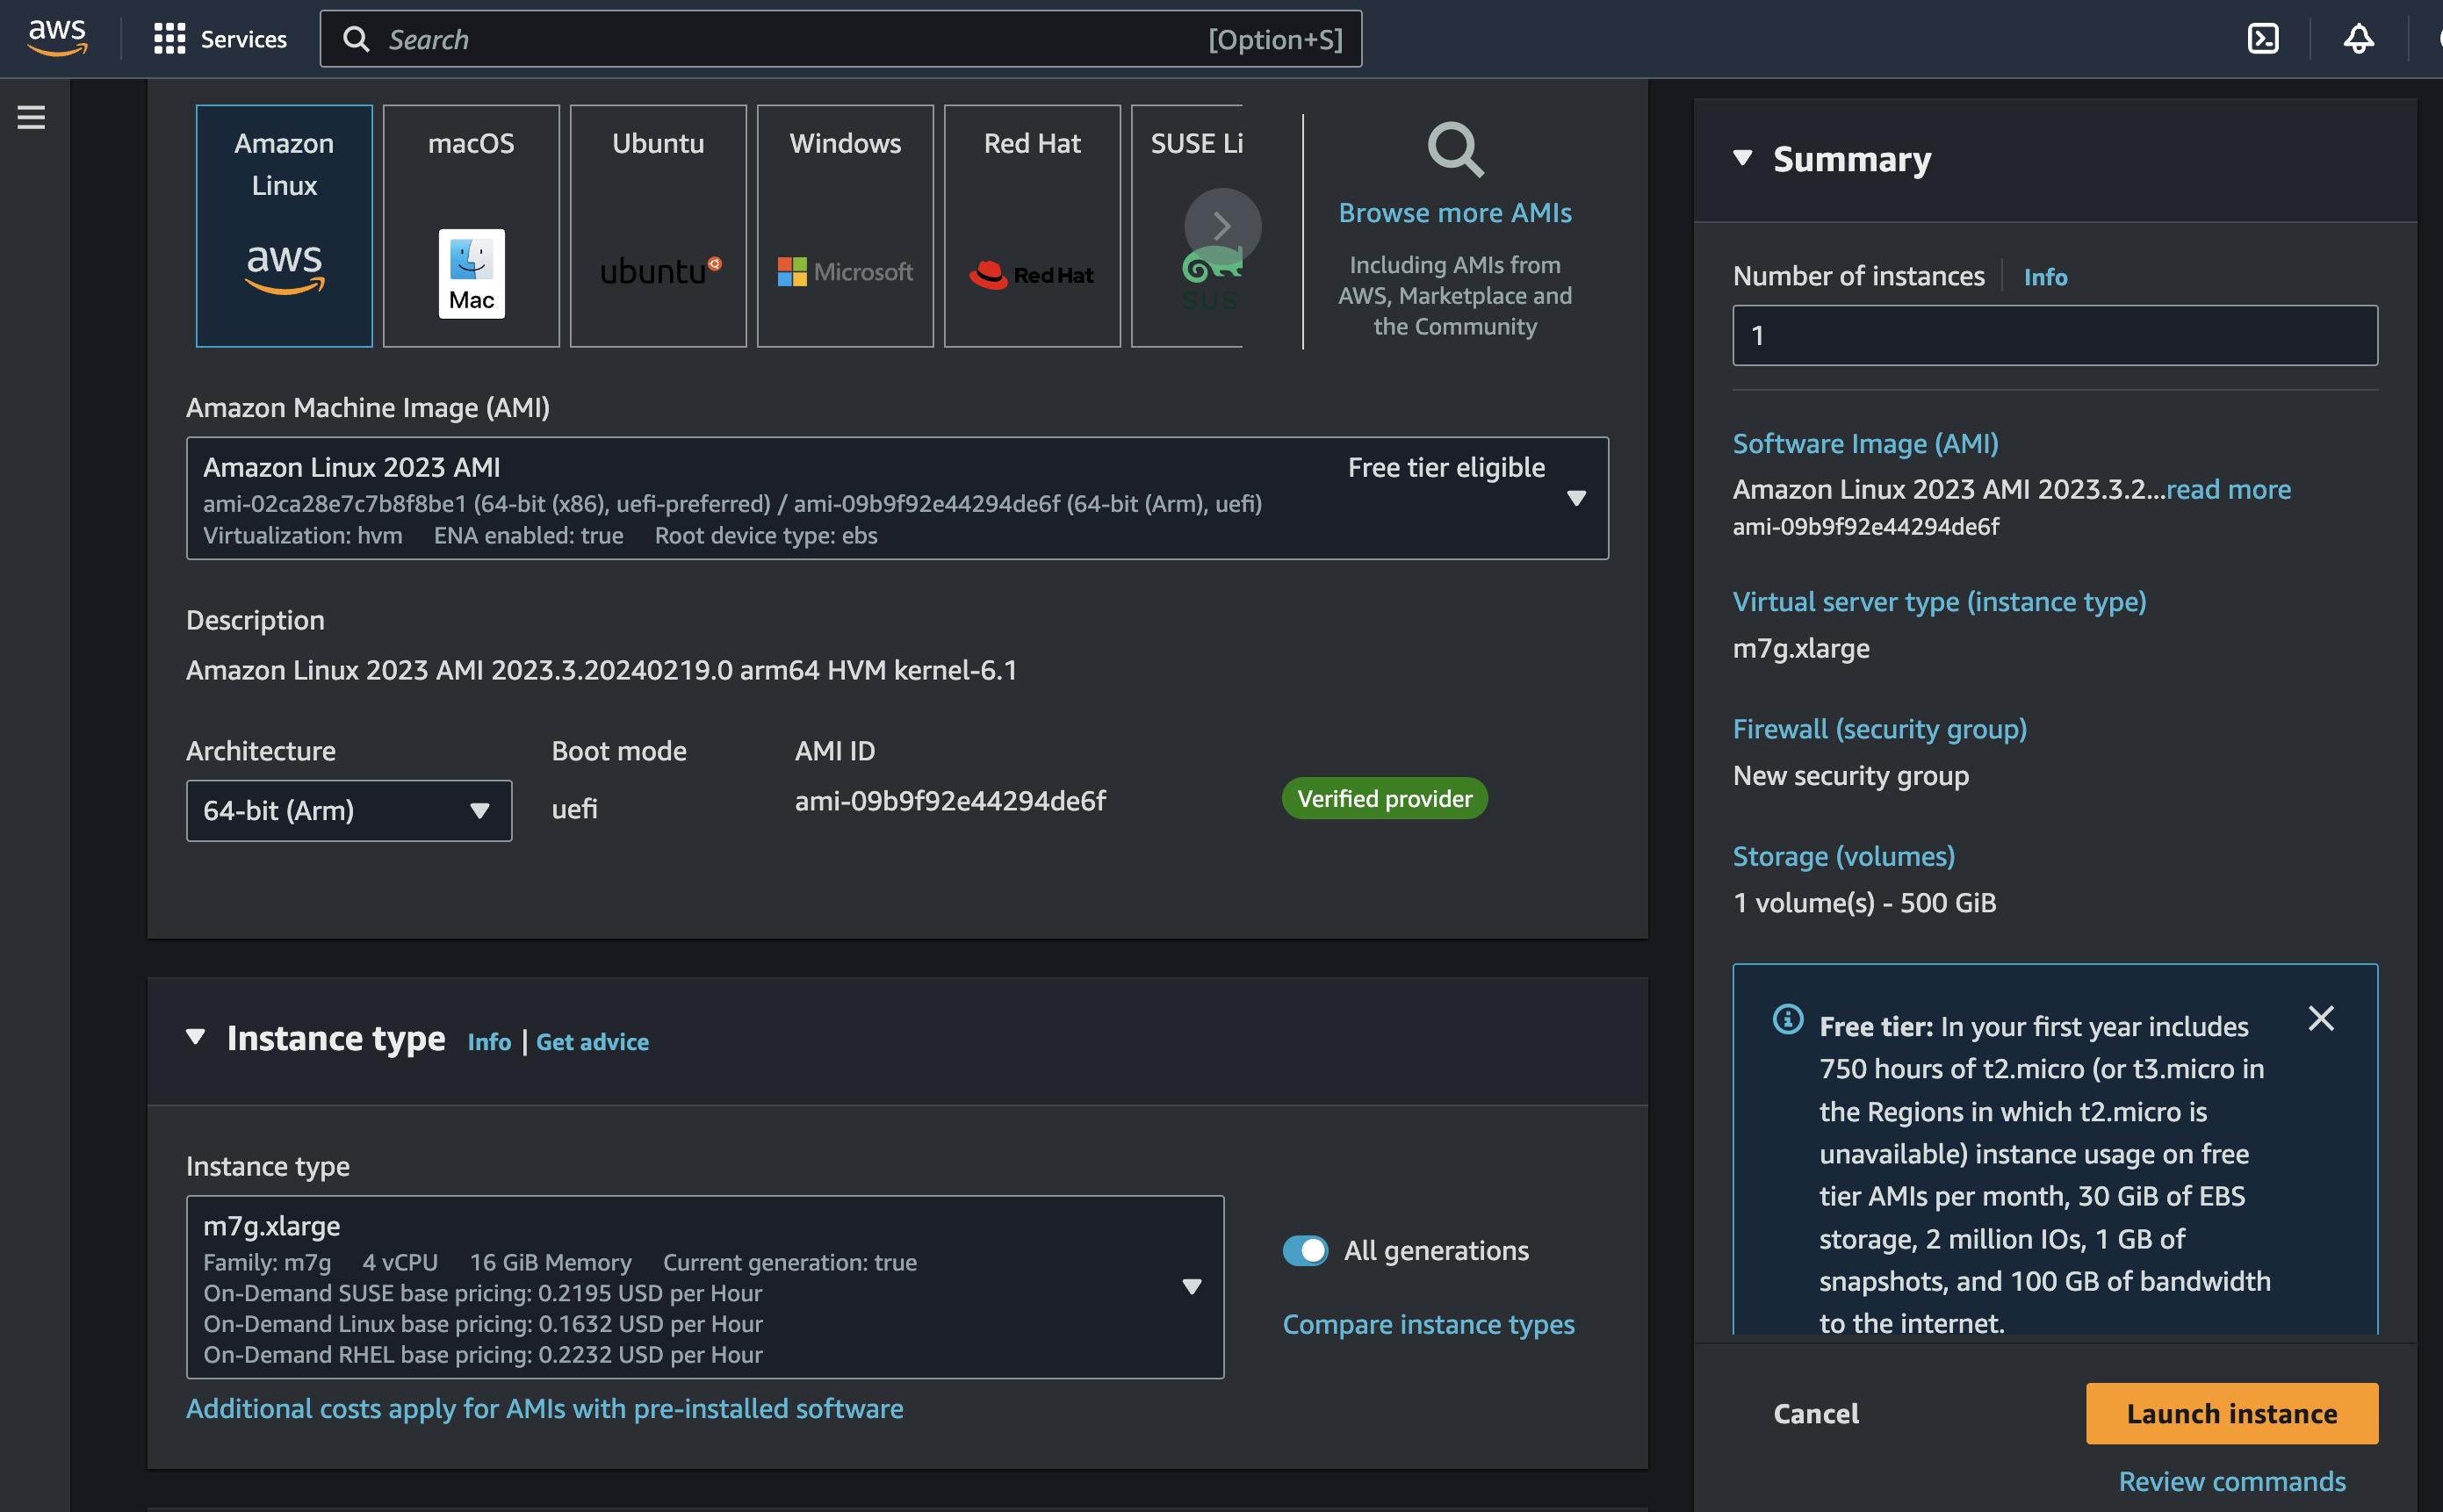
The first step is to start up an EC2 instance with the appropriate resources. We recommend at least 16GB of RAM, 4-8vCPU cores, and 500GB of disk for a small-mid sized organization (< 5000 users). For reference, in our Cloud offering we use am7g.xlarge
with 500GB of EBS storage.
For the below guide, we will assume that you’ve chosen to use AWS Linux with the recommended m7g.xlarge instance.
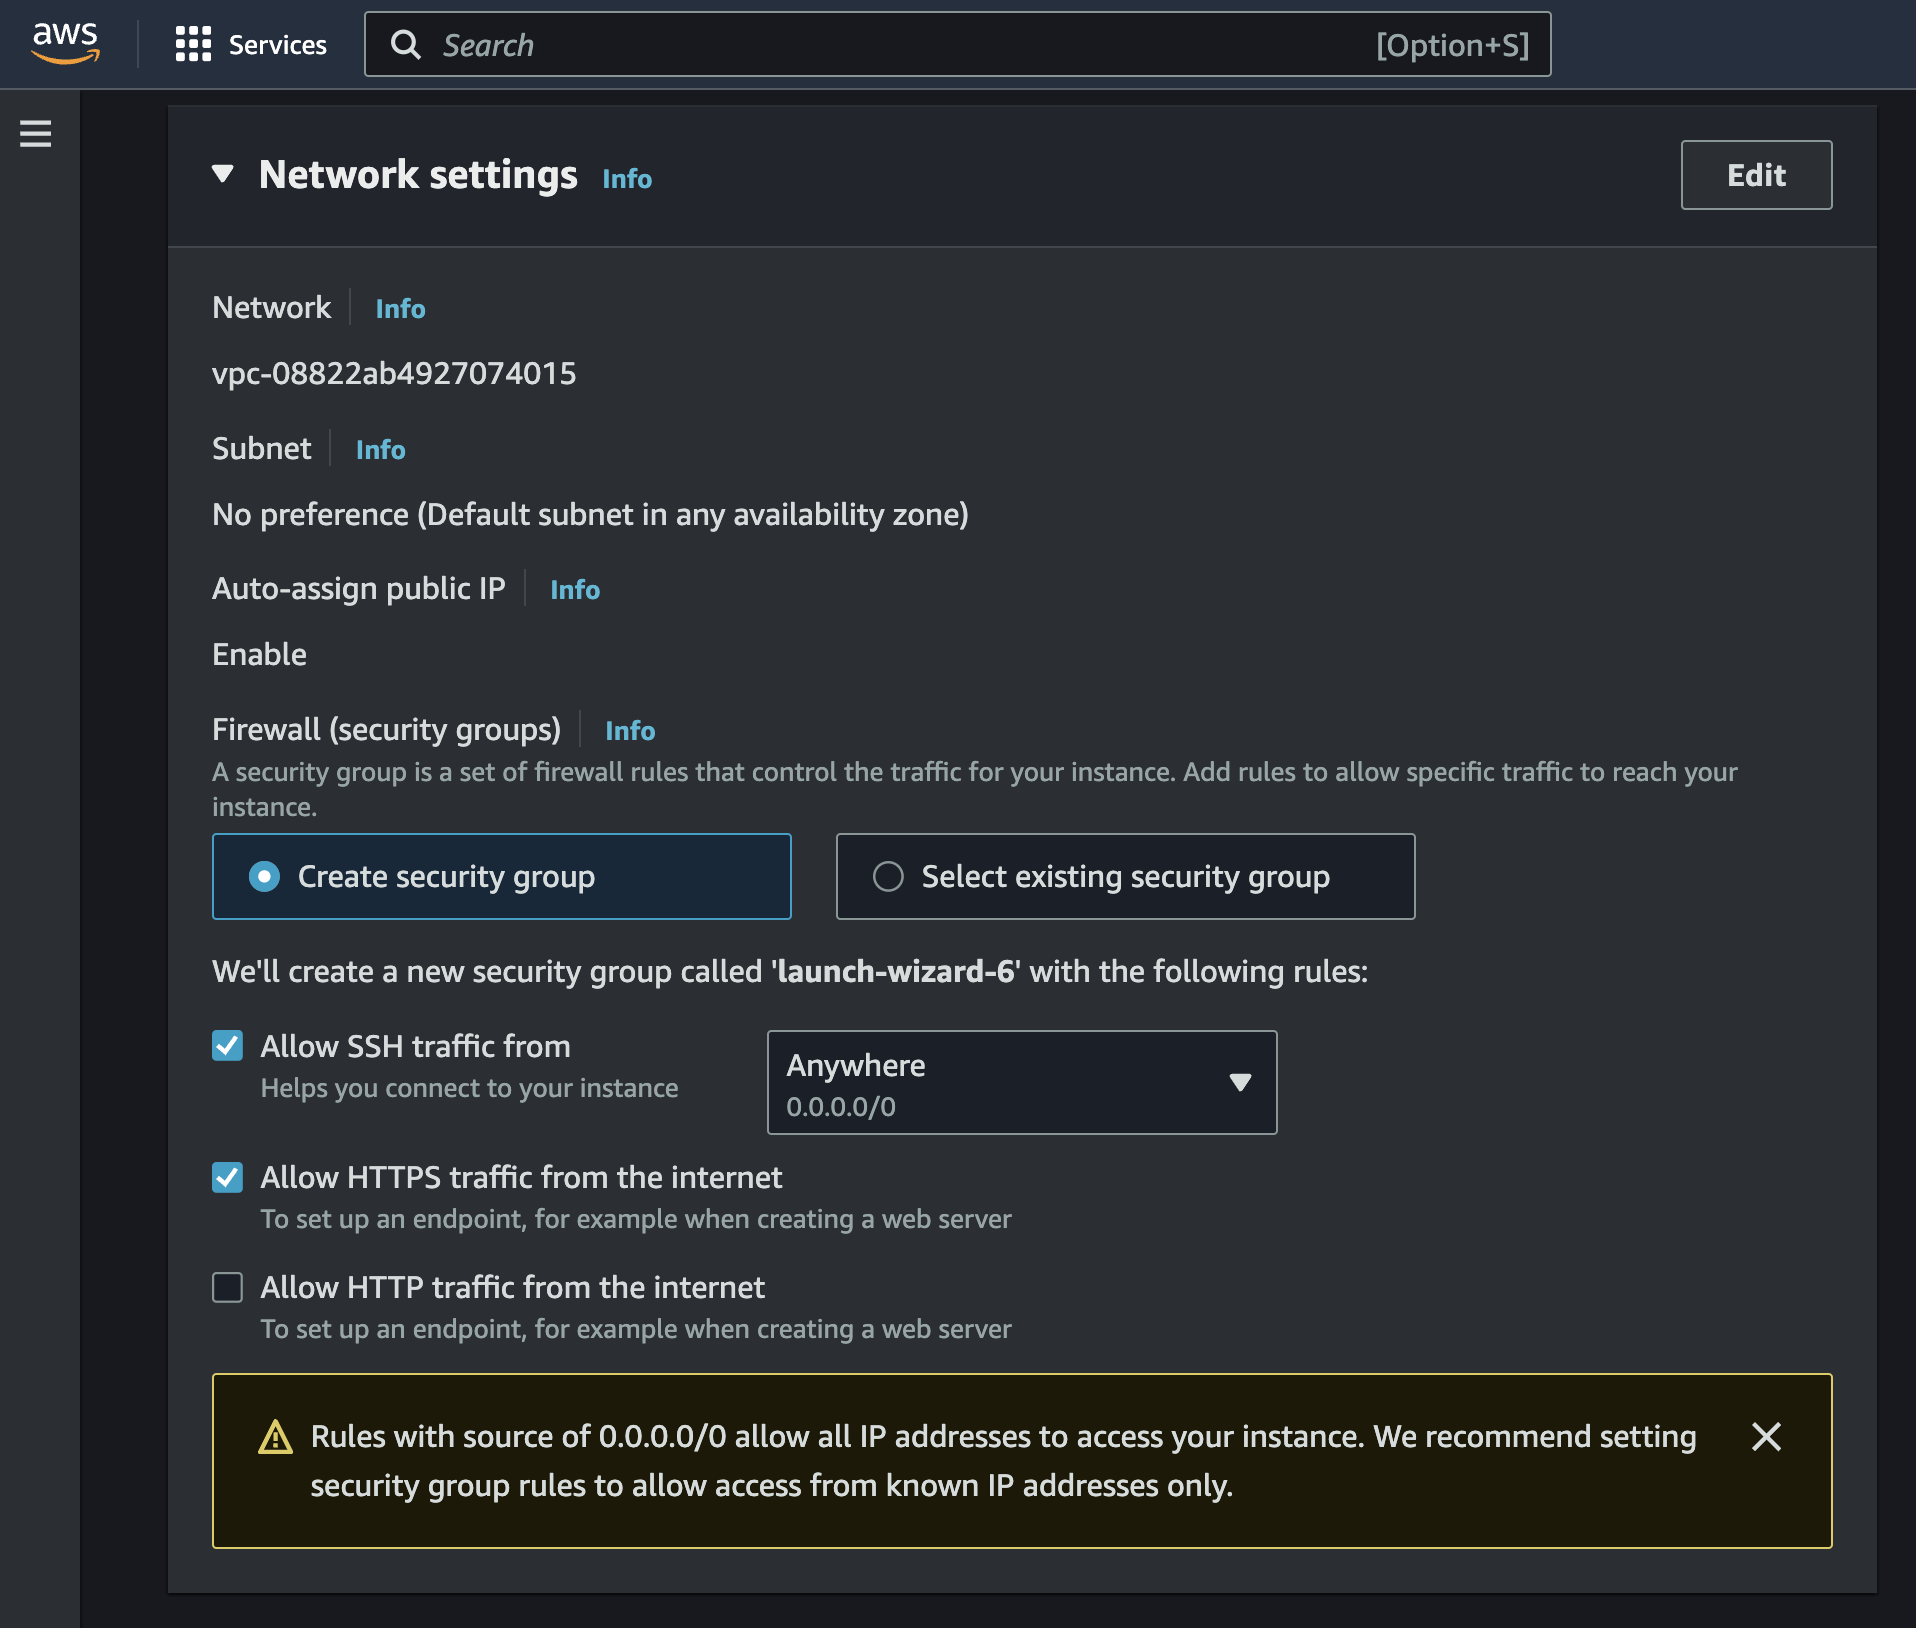
 When setting up the security group for the new instance, make sure that you allow for HTTPS traffic.
Pointing your Domain to the Instance
Next, we should point your domain to the EC2 instance we just created. To do this, we need to go to your DNS and add two records. For this guide, I’ll be assuming your DNS provider is GoDaddy, but it should be almost exactly the same for any DNS provider.If you don’t have a domain to use yet, then you can either buy one from a DNS
provider like GoDaddy or just skip HTTPS for now.
 Finally, we need to head to the DNS provider and add two entries into the DNS:
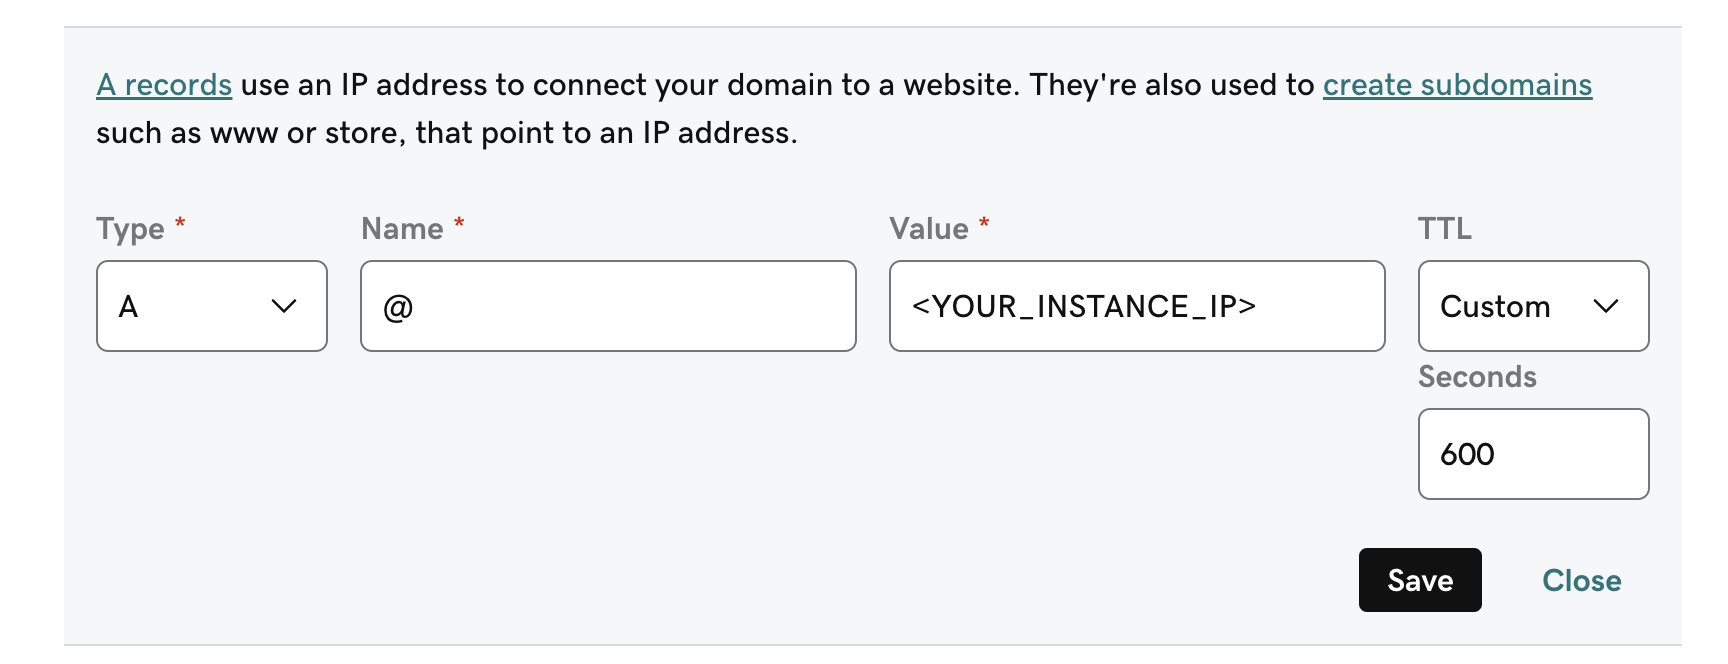
 The first record directs traffic to that domain to your EC2 instance. The second record will handle
www.<YOUR_DOMAIN> and ensure that this also takes the user to your EC2 instance.
Installing Dependencies
Next, we need to preprare the instance so we can actually get RECAP up and running. To do this, you’ll need three things:git, docker, and docker compose. For Amazon Linux 2023, this can be done with the following:
Starting up RECAP
Now that we have everything we need we can startup RECAP. First, let’s clone the repo:.env file, you can copy past the following (filling in the missing fields as needed):
.env.nginx file, put the following:
If are skipping the HTTPS setup, you should start things up with:
docker-compose -f docker-compose.dev.yml -p RECAP-stack up -d --build --force-recreate
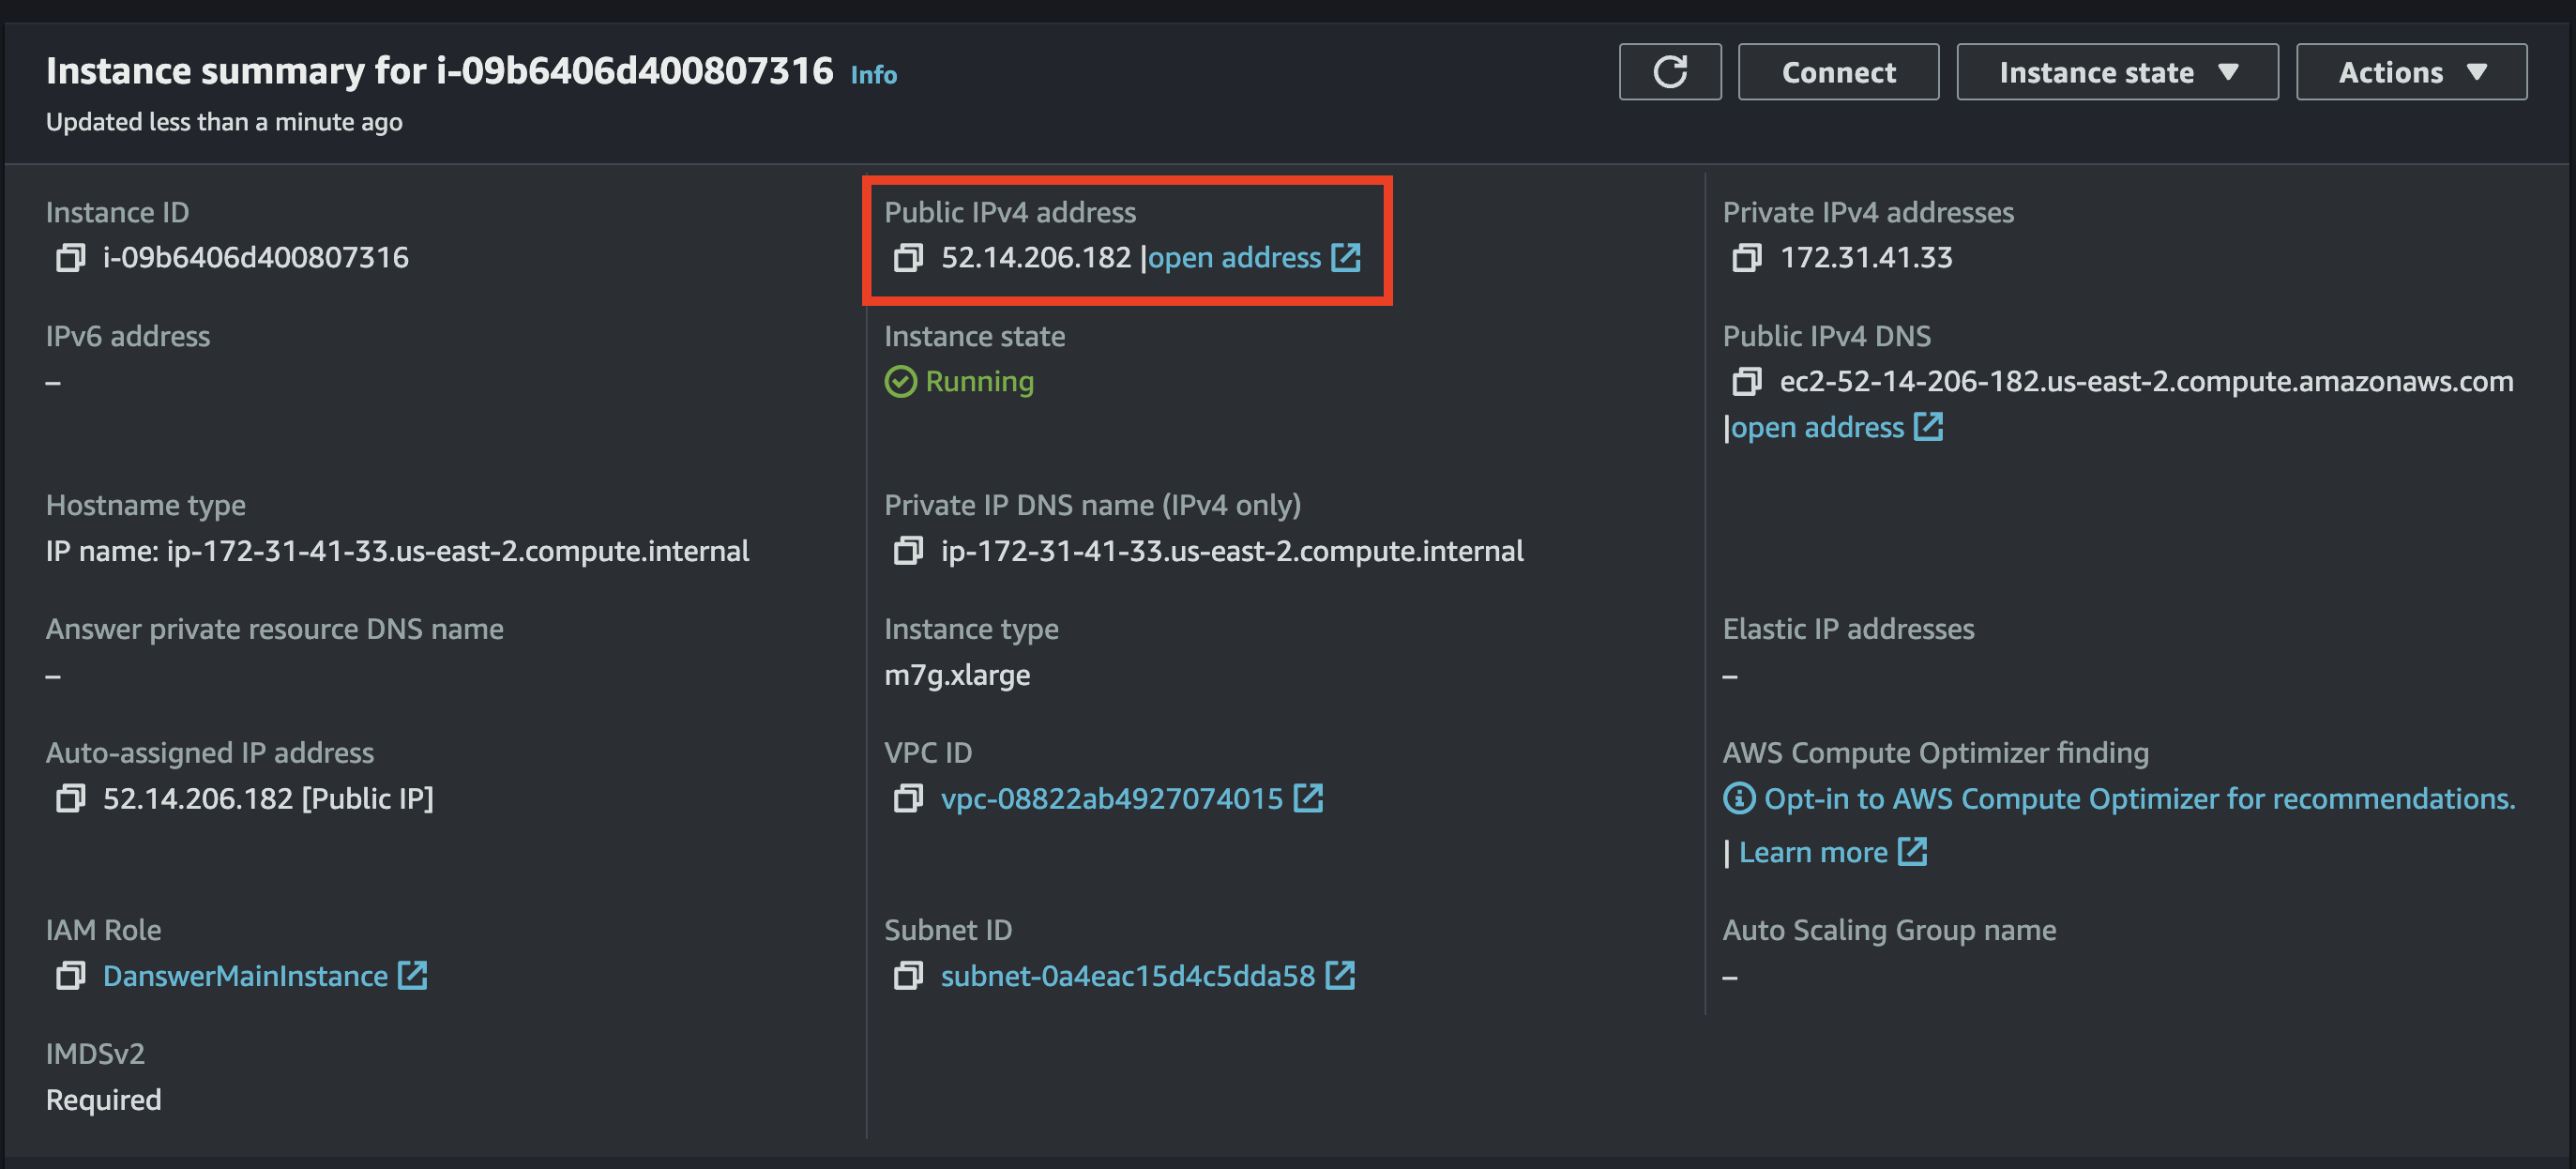
instead of the above. You can then access RECAP from the IP address from earlier or from the
instance Public IPv4 DNS provided on the instance’s page in the AWS console.docker logs RECAP-stack-api_server-1 -f; once you see a log for
INFO: Application startup complete. then everything should be good to go).