- Adding in your own custom application name / logo.
- Customizing every color in the UI.
Customizing the Application Name / Logo
To provide your own application name / logo, you can use theWhitelabelling tab in the admin panel. Here, we provide a way to input
a name of your choice, as well as an optional logo.
Advanced Options
RECAP also has some advanced customization options- Chat Header Content Custom Markdown content that will be displayed as a banner at the top of the Chat page.
-
Popup Header
The title for the popup that will be displayed for each user on their initial visit to the application. If left blank AND Custom Popup Content is specified, will use “Welcome to [Application Name]!” where application name is your filled in application name.
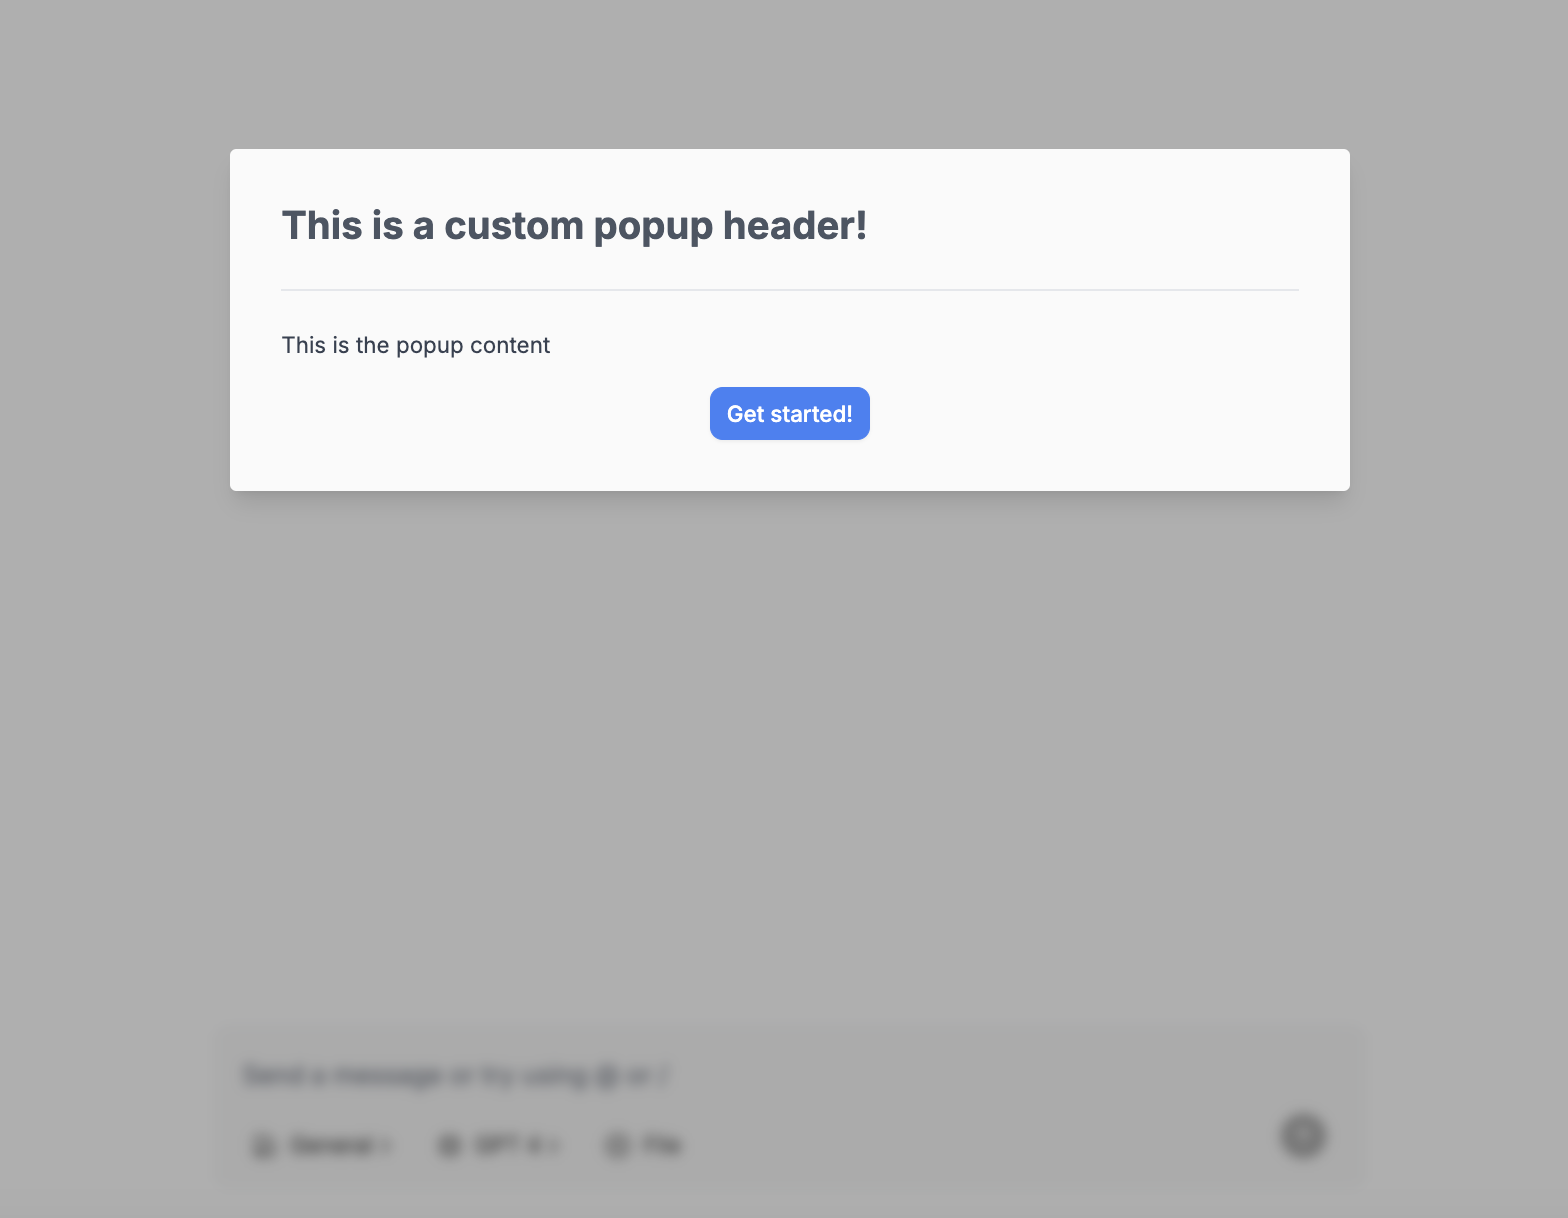
- Popup Content Custom Markdown content that will be displayed as a popup on initial visit to the application.
- Chat Footer Text Custom Markdown content that will be displayed at the bottom of the Chat page.
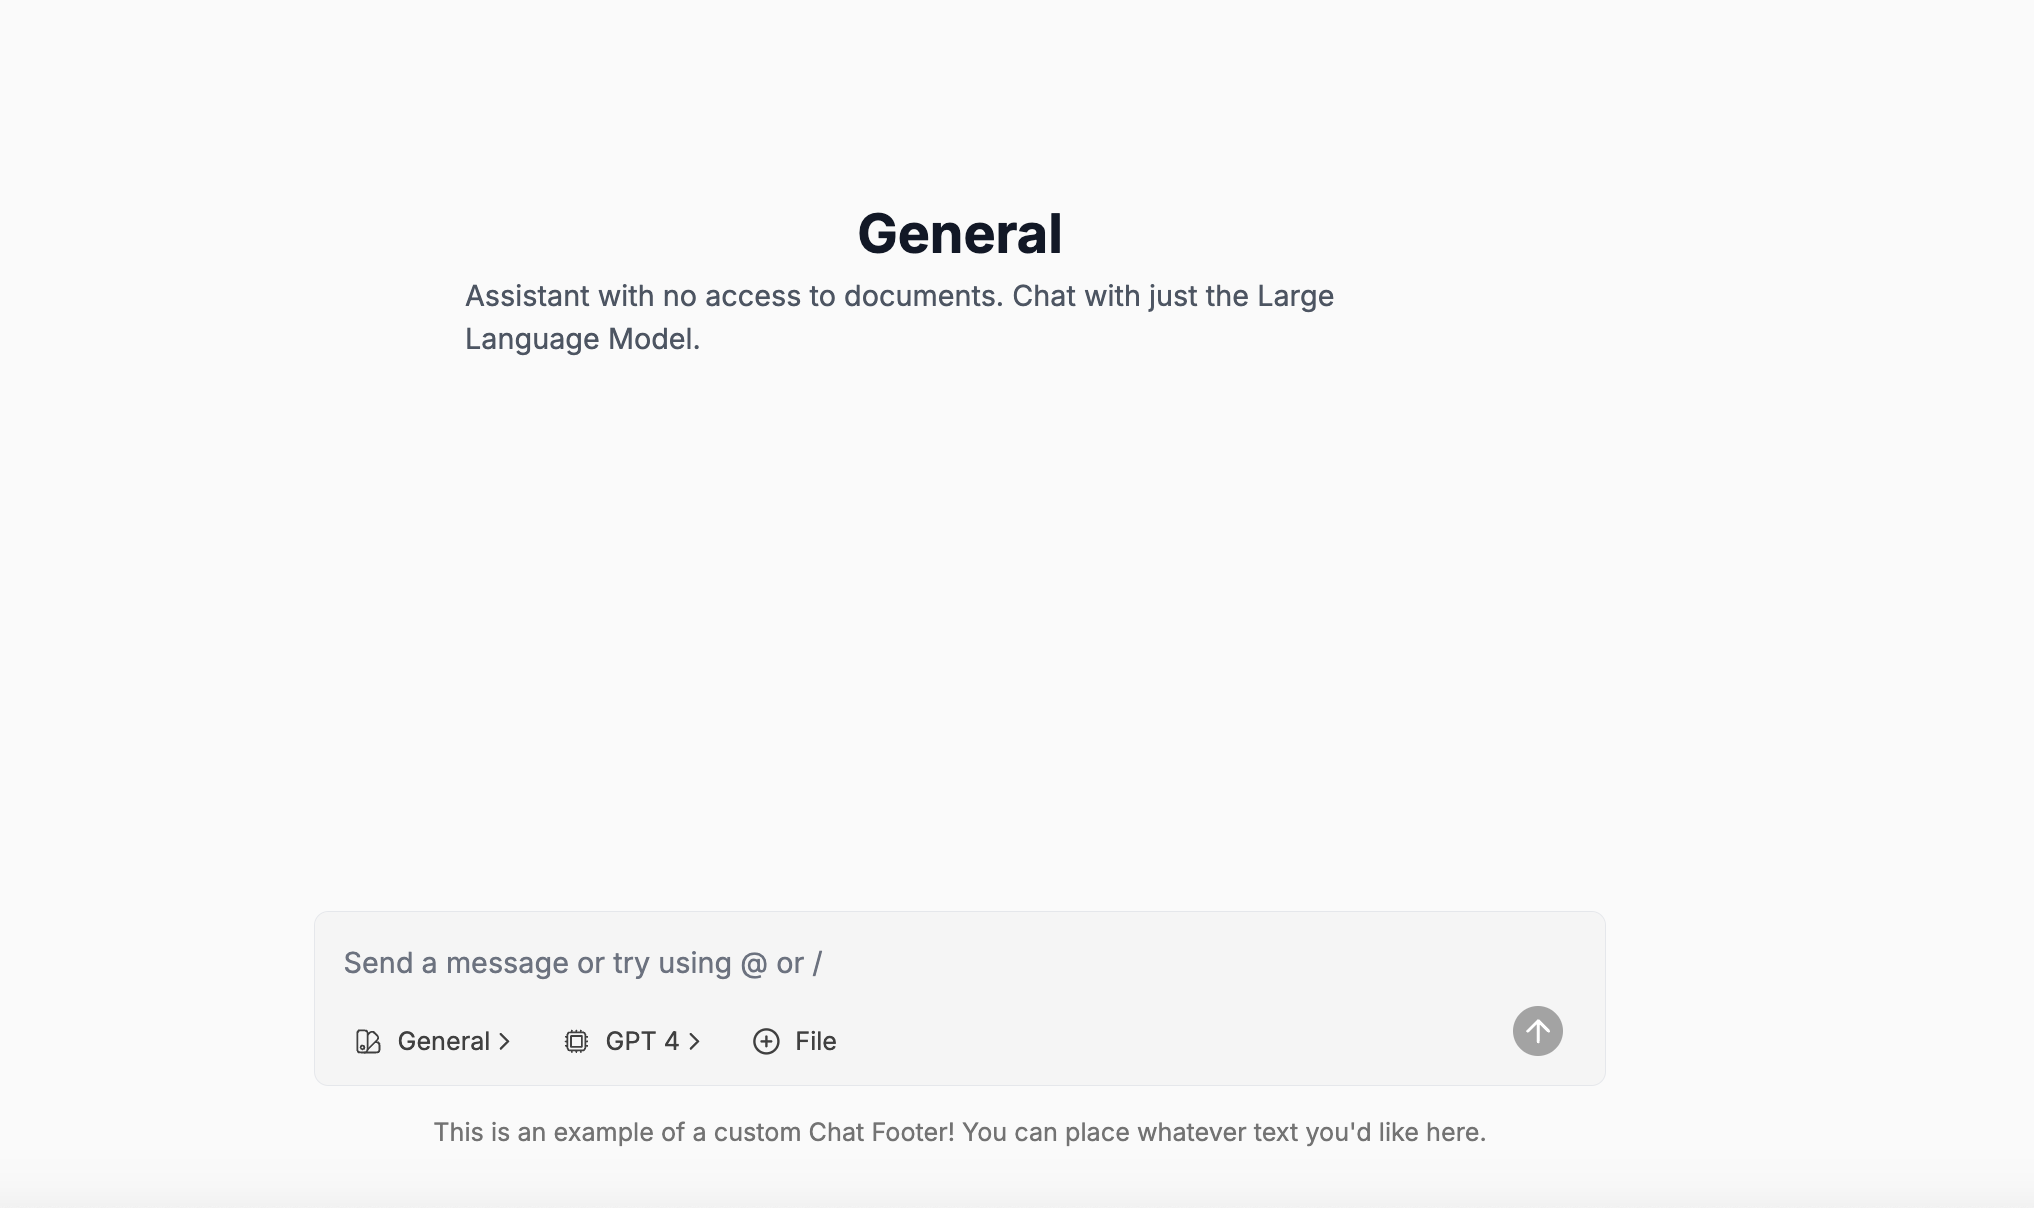
- Chat Footer Logotype Add a custom logotype by uploading a new image and clicking the Update button. This logotype is the text-based logo that will be rendered at the bottom right of the chat screen.

Customizing Colors
RECAP uses Tailwind CSS for theming. The color palette is defined in two main files:web/tailwind-themes/tailwind.config.js: This file contains the base Tailwind configuration, including color definitions.web/src/app/globals.css: This file defines CSS variables for colors, which are then used in the Tailwind config.
- Navigate to
web/src/app/globals.css - Customize the base color palette (for example, create different accent colors, background colors, etc.)
- Navigate to
web/tailwind-themes/tailwind.config.js. - Override any values specified in the base
tailwind.config.jsfile.
- Navigate to
web/tailwind-themes. - Create a new folder with the name of your organization.
- Create a
tailwind.config.jsfile in this new folder. - Override any values specified in the base
tailwind.config.jsfile. - Set
NEXT_PUBLIC_THEMEto the name of your organization (e.g. the same name as the folder you created in step 2).